

***
Please be aware the Ulyaoth Repository has been discontinued! Please read:
https://ulyaoth.com/news/ulyaoth-repository-end-of-life/
You can still make this tutorial work but you will need to compile the packages yourself, please be aware our GitHub is not longer updated however: https://github.com/ulyaoth/repository
***
ULYAOTH REPOSITORY NO LONGER SUPPORTS HHVM
In this guide I will show how you can install phpBB (https://www.phpbb.com/) on Fedora using Nginx and HHVM (old HipHop php).
For this guide I used the following:
forum01 (1x cpu, 512mb ram)
Fedora
phpBB 3.1.x
SSL Certificate
This guide should also work on RHEL and CentOS but you might need to change some directory locations or use slightly different commands.
Step 1: Add the Ulyaoth repository
For Fedora use:
$ dnf install https://downloads.ulyaoth.net/rpm/ulyaoth-latest.fedora.x86_64.rpm
For RHEL or CentOS see my repository for more information:
https://community.ulyaoth.com/resources/ulyaoth.2/
As I wrote in the top of this post that Ulyaoth repository does no longer support HHVM (ulyaoth-hhvm), you will have to compile or download this somewhere else: https://hhvm.com/
Step 2: install the required packages
$ sudo dnf install -y ulyaoth-nginx ulyaoth-hhvm mariadb mariadb-server policycoreutils-python ImageMagick
Step 3: Create the following directories
$ sudo mkdir -p /etc/nginx/access-lists

$ sudo mkdir -p /etc/nginx/ssl

$ sudo mkdir -p /srv/phpbb/public
Step 4: Download phpBB
$ sudo wget https://www.phpbb.com/files/release/phpBB-3.1.7-pl1.zip
Step 5: Unzip your phpBB zip file.
$ unzip phpBB-*.zip
You should now have a folder “phpBB3”.
Step 6: Move all phpBB files to the right directory
$ sudo mv phpBB3/* /srv/phpbb/public/
Step 7: Download the vhost and access-list file for nginx
$ sudo wget -q https://raw.githubusercontent.com/sbagmeijer/ulyaoth/master/guides/phpbb/nginx/phpbb.conf -O /etc/nginx/sites-available/phpbb.conf
Step 8: Install your certificates
Get the certificates from where you bought them or once you generated yourself and place them in:
/etc/nginx/ssl
To create your dhparams file please use the following command:
sudo $ openssl dhparam -out /etc/nginx/ssl/dhparam.pem 4096
Remember if your certificate files are not called “ulyaoth-phpbb.crt”, “ulyaoth-phpbb.key” and “ulyaoth-phpbb.ca” then you have to rename them in your phpbb.conf vhost file so it will use the right certificates.
Step 9: Change the phpbb vhost file to fit your setup.
open phpbb.conf:
$ sudo vi /etc/nginx/sites-available/phpbb.conf
Now change all the domain names from “ulyaoth.net” to your domain name, please make sure to double check your whole file.
Then double check all the certficiate names and name them how your certificates are names (check the whole file):
ssl_certificate /etc/nginx/ssl/ulyaoth-phpbb.pem;

ssl_certificate_key /etc/ssl/certs/ulyaoth-phpbb.key;

ssl_trusted_certificate /etc/ssl/certs/ulyaoth-phpbb.ca;
Now as final you have to create a “sha256 pin” with the following command: (update so it uses your key)
$sudo openssl rsa -in /etc/nginx/ssl/ulyaoth-phpbb.key -outform der -pubout | openssl dgst -sha256 -binary | openssl enc -base64
It should give an output like this:
writing RSA key

zcoKJuisd789hasddasasd32k4VUxsof3d3w22332b7k=
Then in the vhost update this bit with your key:
add_header Public-Key-Pins "pin-sha256=\"zcoKJuisd789hasddasasd32k4VUxsof3d3w22332b7k=\"; max-age=172800;";
That is it now continue with the guide!
Step 10: symbolic link your vhost
$ sudo ln -s /etc/nginx/sites-available/phpbb.conf /etc/nginx/sites-enabled/phpbb.conf
Step 11: Copy the example config for a small MariaDB database to real config location.
$ sudo cp /usr/share/mariadb/my-small.cnf /etc/my.cnf
Of-course if you expect a large database you have to or make your own MariaDB config or in the location “/usr/share/mysql/” you have more examples:
my-huge.cnf
my-large.cnf
my-medium.cnf
my-small.cnf
my-innodb-heavy-4G.cnf
Step 12: Start the MariaDB database
$ sudo systemctl start mariadb.service
Step 13: run the MariaDB secure installation script
$ sudo /usr/bin/mysql_secure_installation
I would recommend to do the steps I did below:
Enter current password for root (enter for none): (ENTER)
Set root password? [Y/n] Y
New password:
Re-enter new password:
Password updated successfully!
Remove anonymous users? [Y/n] y
Disallow root login remotely? [Y/n] y
Remove test database and access to it? [Y/n] y
Reload privilege tables now? [Y/n] y
Step 14: Login to the MariaDB database
$ sudo mysql -uroot -p
(you have to use the password from Step 13 that you created)
Step 15: In the MariaDB client create the following user and database
CREATE DATABASE phpbb;

GRANT ALL PRIVILEGES ON phpbb.* TO "phpbb"@"localhost" IDENTIFIED BY "ulyaoth007";

GRANT ALL PRIVILEGES ON phpbb.* TO "phpbb"@"127.0.0.1" IDENTIFIED BY "ulyaoth007";

FLUSH PRIVILEGES;
(Make sure to change to example password “ulyaoth007” to something random)
Step 16: exit the MariaDB client
exit
Step 17: Put everything on auto-start
$ sudo systemctl enable mariadb.service

$ sudo systemctl enable hhvm.service

$ sudo systemctl enable nginx.service
Step 18: Chown the web directory to hhvm:nginx
$ sudo chown -R hhvm:nginx /srv/phpbb
Step 19: Fix directory permissions
$ sudo find /srv/phpbb/public/ -type d -exec chmod 755 {} \;

$ sudo find /srv/phpbb/public/ -type f -exec chmod 644 {} \;

$ sudo chmod 777 /srv/phpbb/public/files

$ sudo chmod 777 /srv/phpbb/public/cache

$ sudo chmod 777 /srv/phpbb/public/store

$ sudo chmod 777 /srv/phpbb/public/images/avatars/upload

$ sudo chmod 666 /srv/phpbb/public/config.php
We have to change back “config.php” to 640 at the end of the installation.
Step 20: fix SELinux
$ sudo setsebool -P httpd_can_network_connect on

$ sudo chcon -R -t httpd_sys_content_t /srv/phpbb/public/

$ sudo chcon -t httpd_sys_rw_content_t /srv/phpbb/public/files

$ sudo chcon -t httpd_sys_rw_content_t /srv/phpbb/public/cache

$ sudo chcon -t httpd_sys_rw_content_t /srv/phpbb/public/store

$ sudo chcon -t httpd_sys_rw_content_t /srv/phpbb/public/images/avatars/upload

$ sudo chcon -t httpd_sys_rw_content_t /srv/phpbb/public/config.php

$ sudo semanage port -a -t http_port_t -p tcp 80

$ sudo restorecon /etc/nginx/ssl/*
Step 21: configure firewalld
$ sudo firewall-cmd --permanent --zone=public --add-service=http

$ sudo firewall-cmd --permanent --zone=public --add-port=443/tcp

$ sudo firewall-cmd --reload
You can check with this command to see it is all added:
$ sudo firewall-cmd --zone=public --list-all
You probably have to change “zone=public” to your servers setup.
Step 22: Start nginx and hhvm
$ sudo systemctl start hhvm.service

$ sudo systemctl start nginx.service
Congratulations this should be everything you require to do on the server to start with the installation of phpBB!
Step 23: Start and finish the installation of phpBB
Start by going to your website for me “https://forum.ulyaoth.net” and you should see the following:
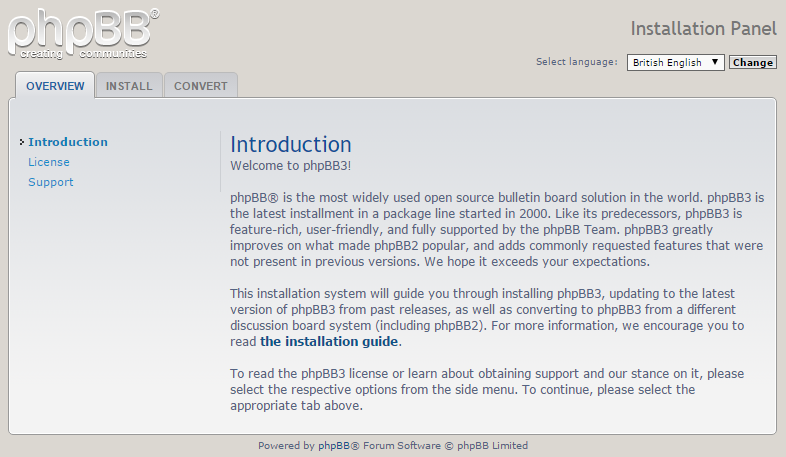
You can read the introduction and the license and then click in the top next to “OVERVIEW” on “INSTALL” and you will see the following page:
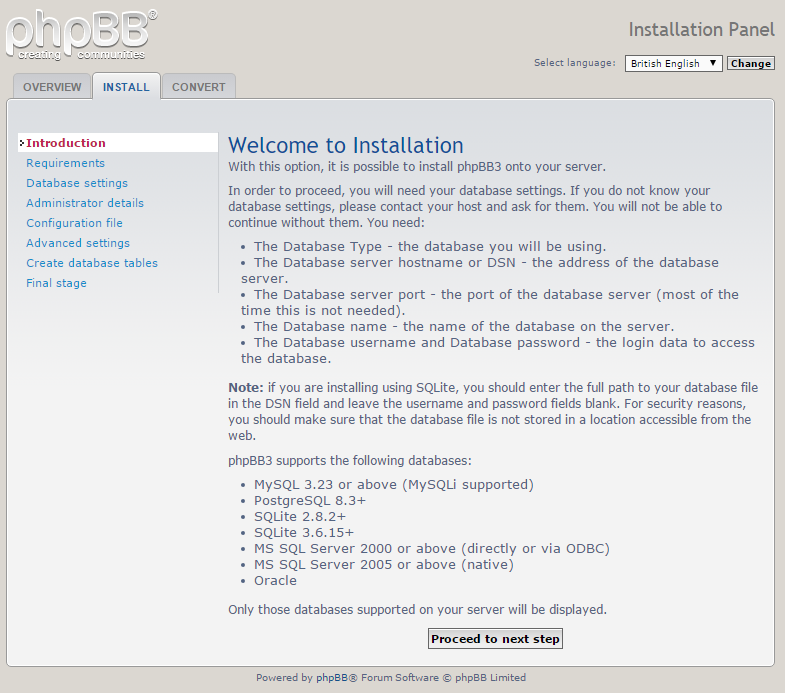
On the page read the information and then click on the “Proceed to next step” button and you will see the following site:
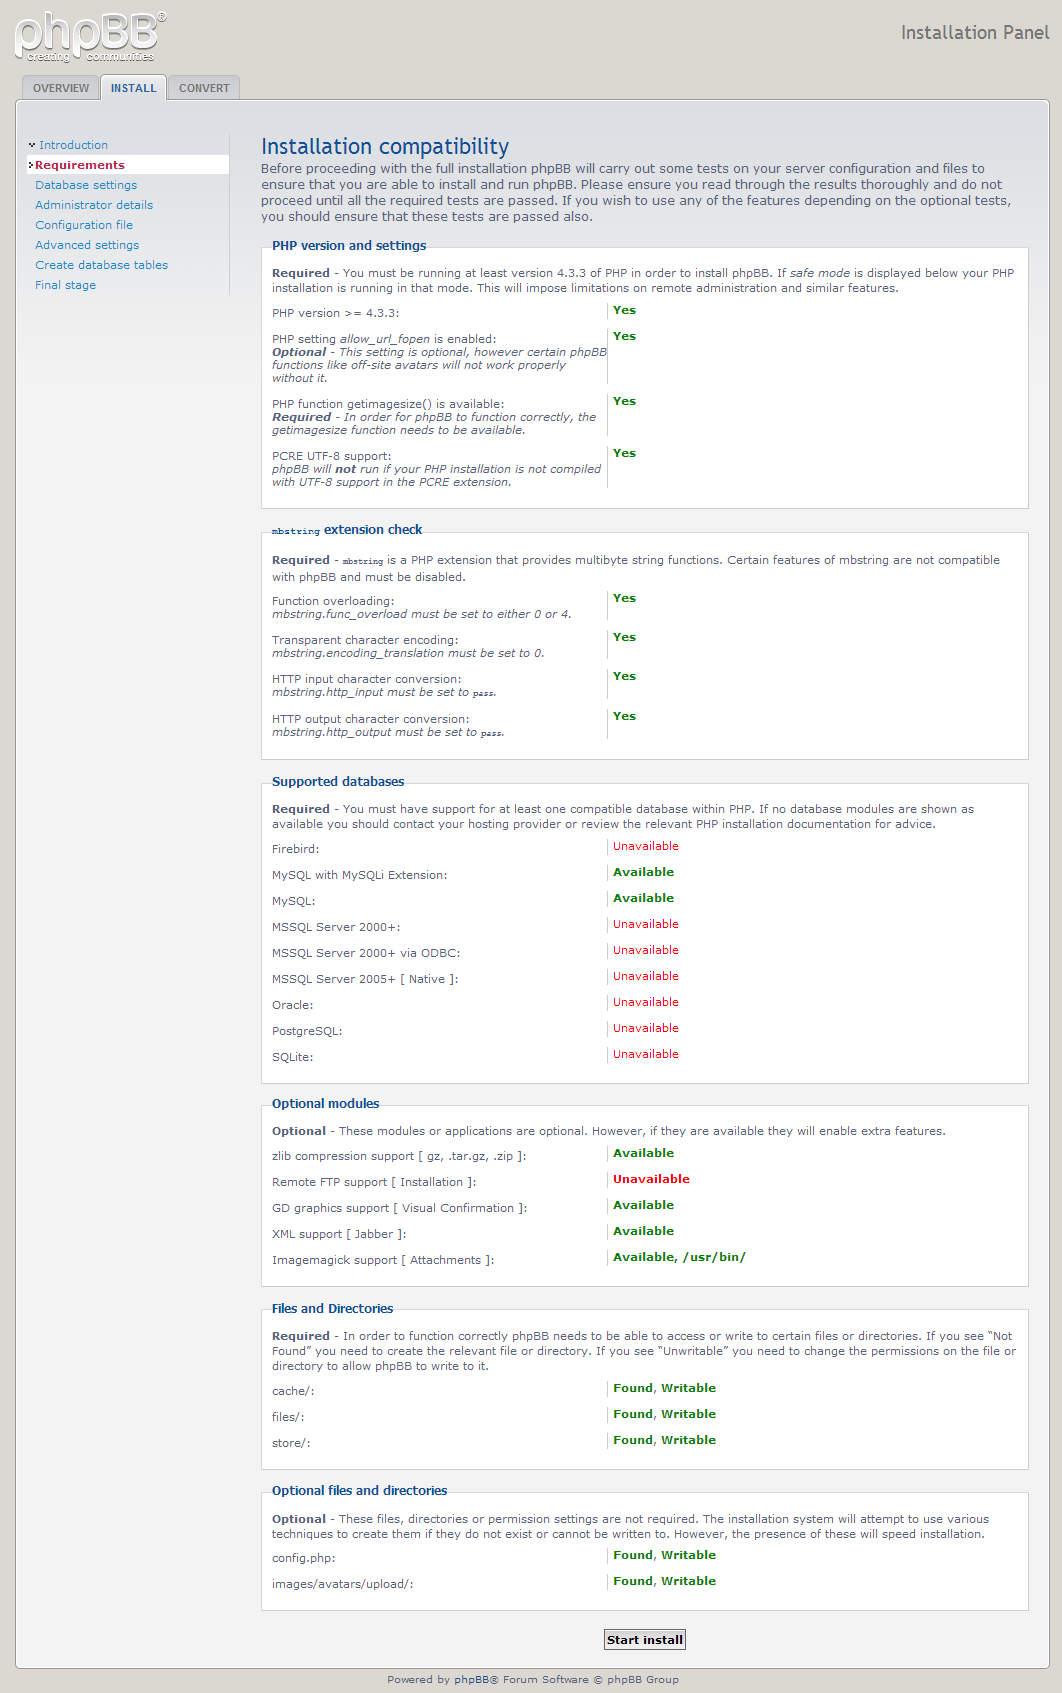
As you can see for me it shows “Unavailable” but all of this is non required things and everything you need to install it is available.
So once you did read trough it and you think everything looks fine for you also then press on the “Start install” button and you will see the following site:
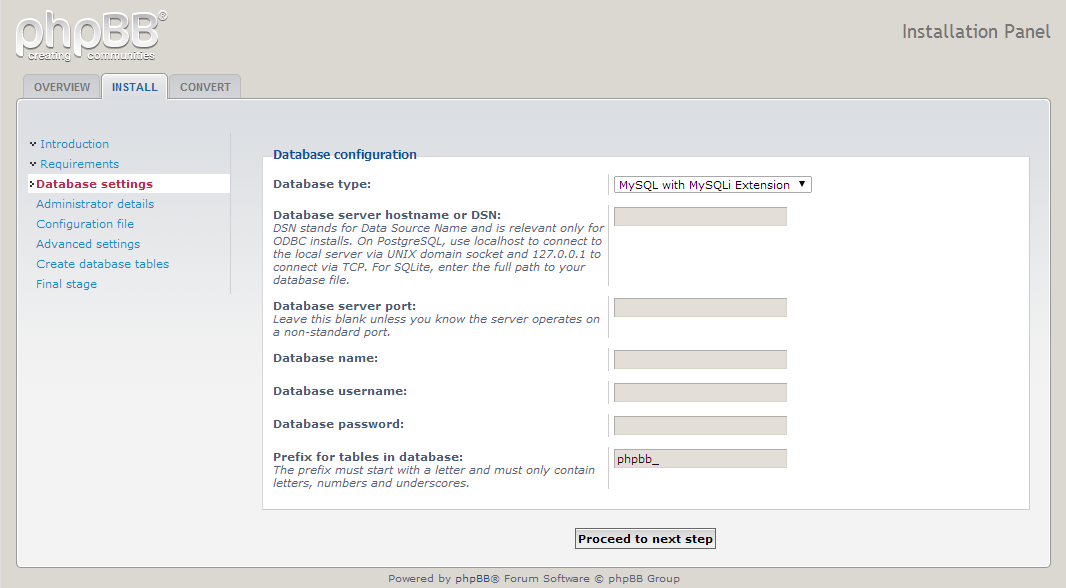
On this page you have to fill in the database information from step 15:
Database type: MySQL with MySQLi Extension
Database sever hostname or DSN: localhost
Database server port: (leave this one blank)
Database name: phpbb
Database username: phpbb
Database password: ulyaoth007
Prefix for tables in database: phpbb_ (should already be filled in)
Of-course change it to your information and then press on the button “Proceed to next step” and you will see the following page:

If you filled in your database information correctly it should show “Successful connection” if it failed you have to go back to the previous page to change your settings.
Now simply click on the “Proceed to next step” button and you will see the following page:
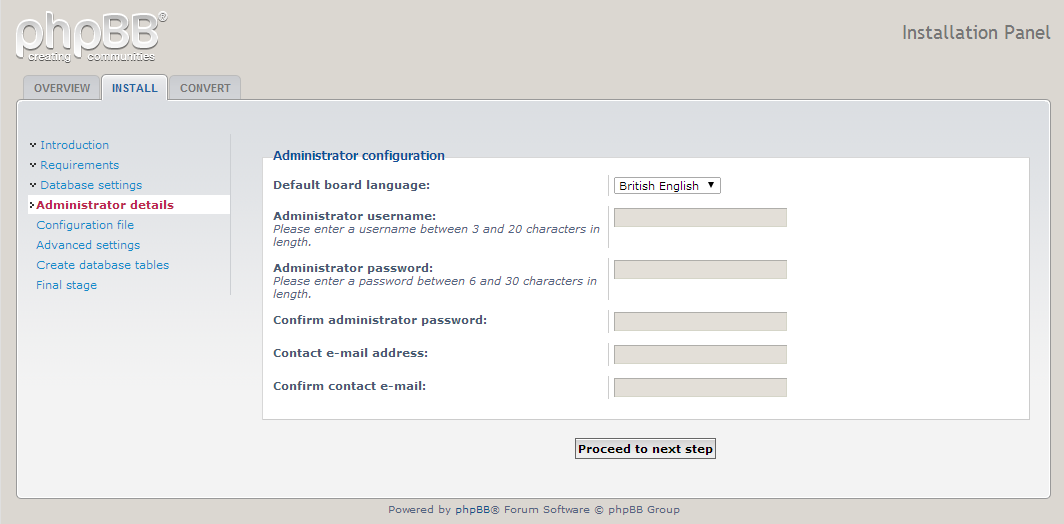
On this page you have to fill in your “Administrator” account information this user will control your forum, it is important that you not choose the user “Admin” or “Administrator” as this are the first users bots or scripts will look to gain access to your website.
Also, use a difficult to guess password for this account, preferably you will only use it to maintain and make a secondary user to post.
Once filled in then press the button “Proceed to next step” and you will see the following page:
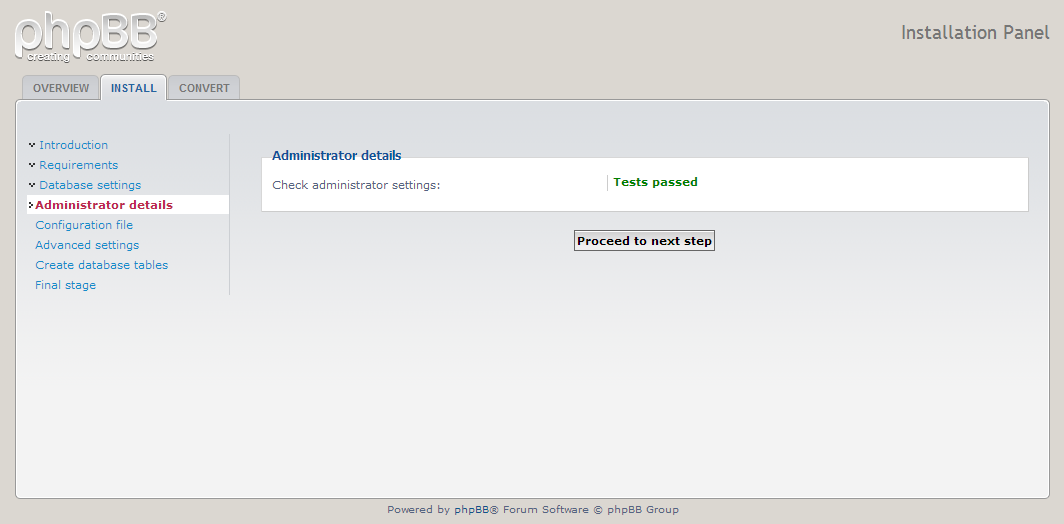
This page just shows if you filled in everything correctly and used a secure password if this failed fix the mistakes.
If it shows “Test passed” press the “Proceed to next step” button to see the following page:
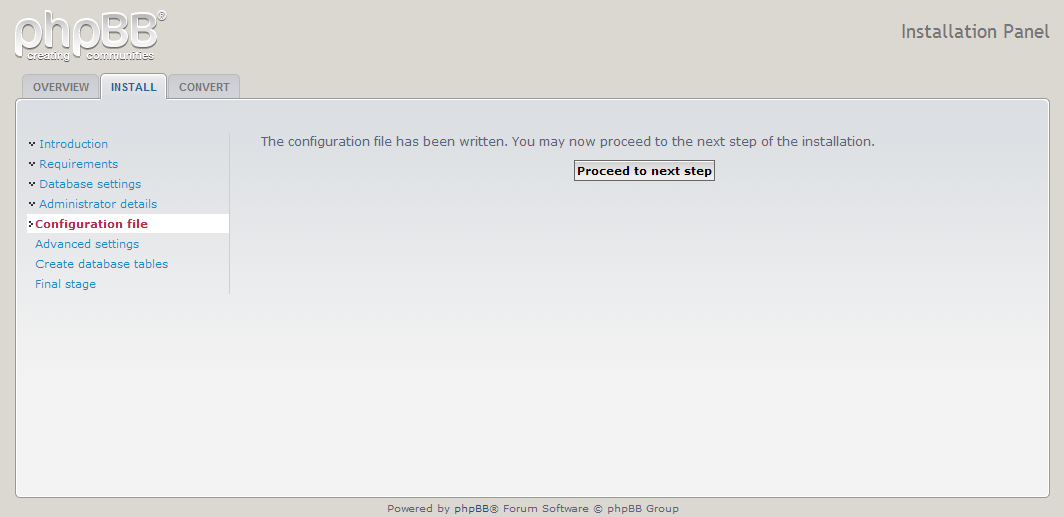
Because we did make the config.php writeable with permission “666” in step 20 it did automatically write the changes.
If for some reason it did not go one step back and follow “Step 20” once more, for now continue by pressing the “Proceed to next step” button to see the following site:

On this page you can change additional settings, if you do not know anything about this just leave the defaults. (all those settings you can change later also in the Control Panel)
For me everything is already filled in correctly so I continue by pressing the button “Proceed to the next step” and will see the following page:
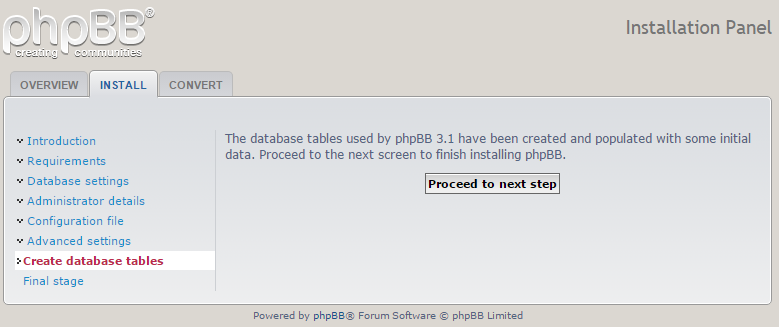
This page just shows the database has been successfully created and all data was added so click on “Proceed to next step” and you see the following site:
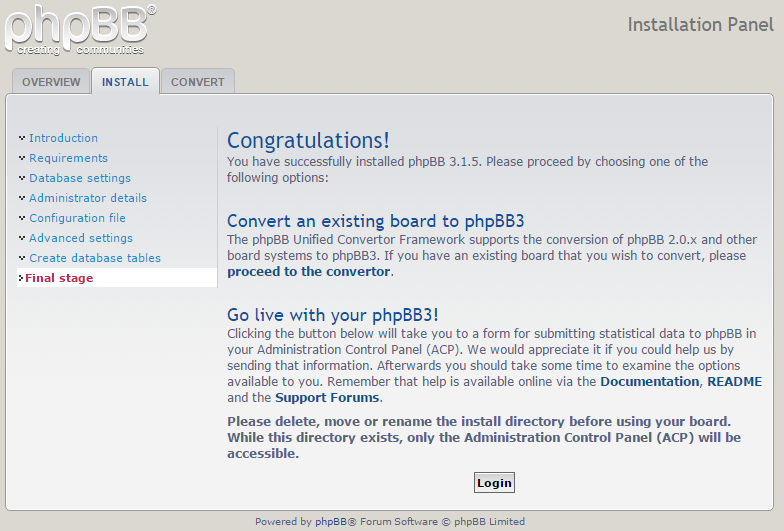
Congratulations! You now have successfully installed phpBB! However, before you click the “Login” button to go to your control panel please first complete the next two steps.
Step 24: Fix the permissions on “config.php”.
$ sudo chmod 640 /srv/nginx/phpbb/public/config.php

$ sudo chcon -t httpd_sys_content_t /srv/nginx/phpbb/public/config.php
Step 25: Delete the install directory.
$ sudo rm -rf /srv/nginx/phpbb/public/install/
And that is it, you can now go back to your site and press the “Login” button or go to the main site by browsing to it.
Your website should look like this if you successfully completed this guide:
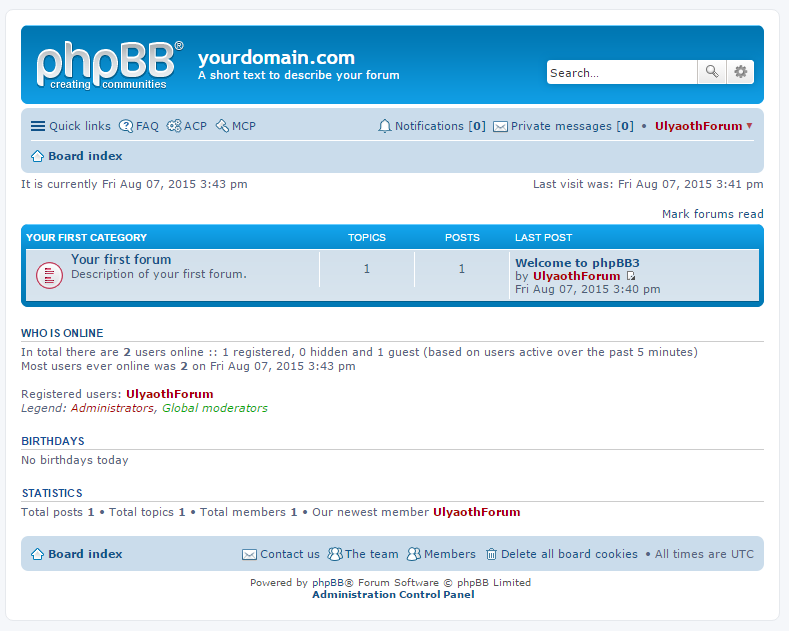
What next? go to your “Control Panel” and change your site name to “yourdomain.com” will show something fancy instead!
Good luck with phpBB!