

I recently had a friend asking me how he could install an HTML5 template he bought on AWS, he already had been reading up and so far found out that he could use EC2 and in all honesty, he was making things extremely complicated. So I helped him to set up everything on S3 and Cloudfront this saved him money and it was extremely easy also once he knew how to do it.
I decided to make a small tutorial about it and I hope anyone else can use this information also.
So what will we create in this tutorial:
1x Cloudfront
1x S3 bucket
What is required? for the purpose of this tutorial a simple “Hello World” file named index.html would be fine, so let’s create one “Hello World” page:
You can use this:
<meta charset="UTF-8">
<title>Hello World!</title>

Welcome to my awesome HTML website hosted on S3!
You can just copy the content to a text editor and save it as “index.html”.
Now let’s get started! Login to your AWS account and follow along.
Since both S3 and Cloudflare are global services you can do this from within any region so let us start by creating an S3 bucket.
From the main AWS page please search for S3 and click on this to open it up.
On this page you see a big blue button called “+ Create bucket” you can start by clicking on this, and you will see the following: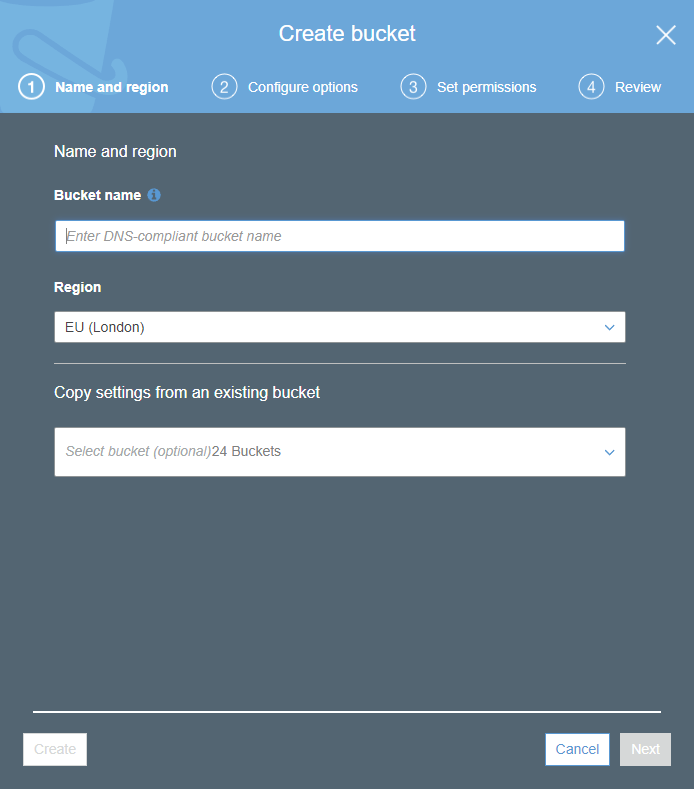
So on this page we must choose two things, first is a unique bucket name, second is the region you wish to put the bucket.
Please choose this information yourself, but just in case I choose this:
Bucket Name: ulyaoth-s3-html-tutorial
Region: Asia Pacific (Sydney)
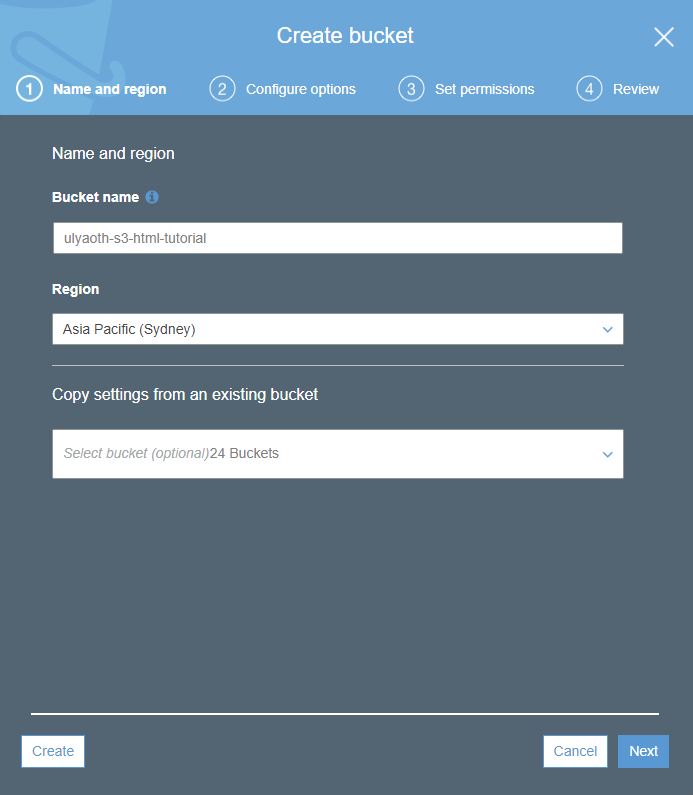
Remember to choose your own unique name and region, and then press on the “Create” button.
Within a few seconds your bucket is created and available:
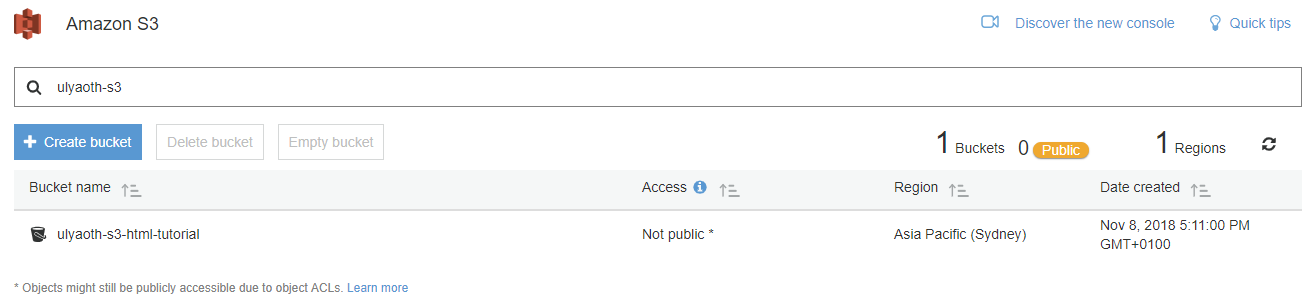
This was all to create an S3 bucket! easy right?
Now let us upload your index.html page to S3.
Click on your bucket and you should see something like this: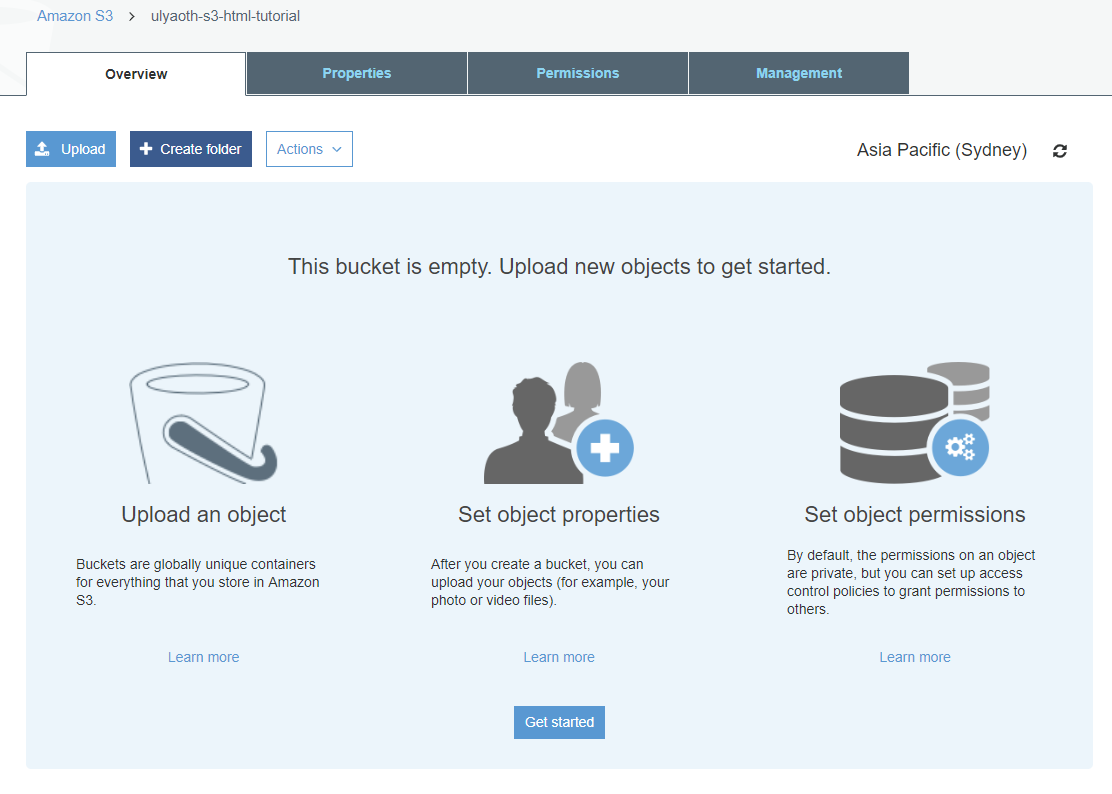
Now press the light blue “Upload” button and you will see: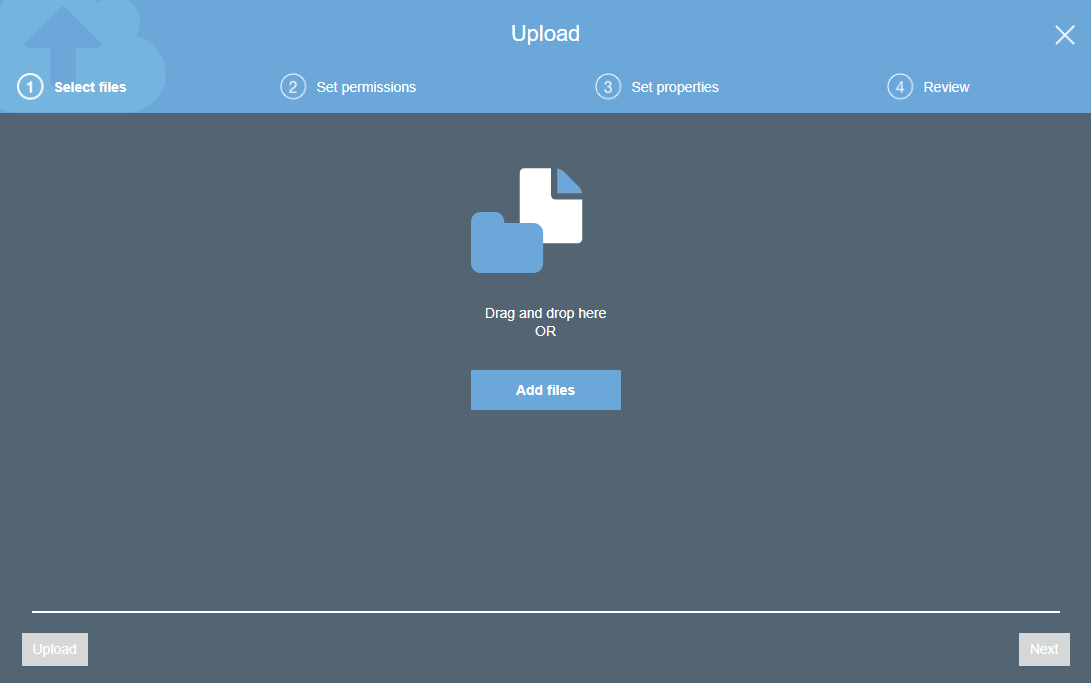
So all you do is drag and drop the “index.html” file I told you to make to this popup and you will see: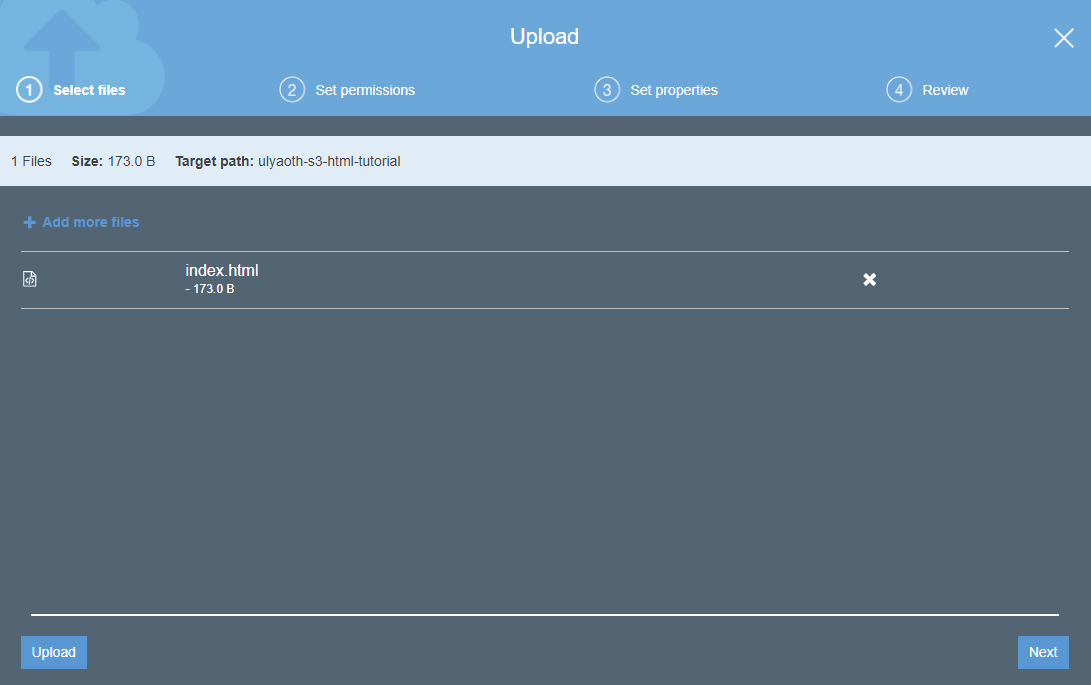
If it looks similar to you then press the “Upload” button and you will see the file upload to your bucket: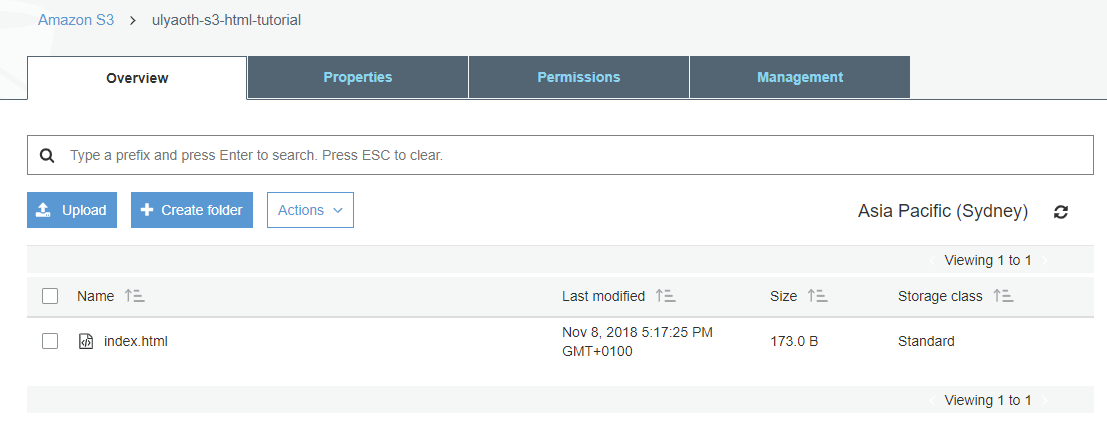
Congratulations! this was actually all you had to do to upload your simple HTML website to AWS, of course, in reality, you might also upload images, more pages etc but you could technically do all this in the exact same way. (there are better and more advanced ways, but I left those out this tutorial)
So for example in the above interface where you dropped the HTML page you could drop a whole website it would look similar to this then: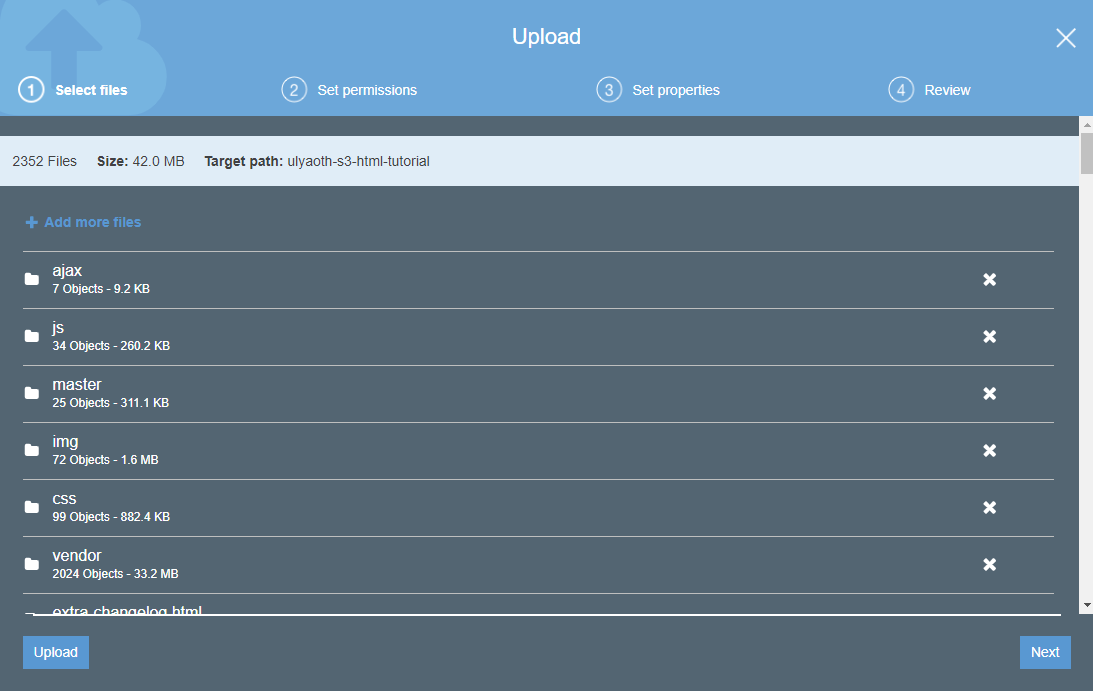
You see it is exactly the same we did for 1 file but then hundreds of files.
But let’s continue by creating a CloudFront distribution.
CloudFront is Amazon’s CDN, but it is also great to keep your S3 bucket private and only serve your pages through CloudFront.
So to create a CloudFront go back to the main AWS page by clicking on the AWS logo in the top, and this time search for “CloudFront” and click on it.
When you are in the CloudFront interface you can directly click on the blue button called “Create Distribution” and you will see: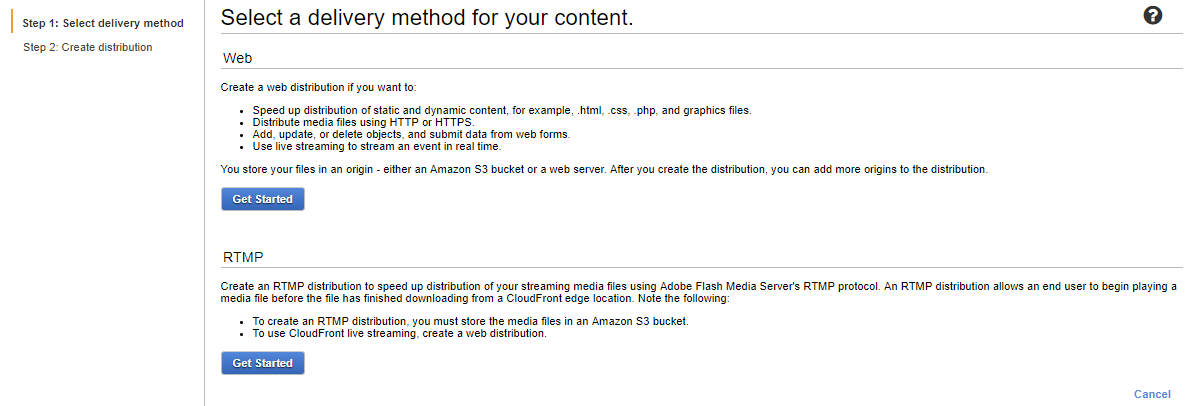
For this tutorial we will use the first option “Web” so click there on the blue button “Get Started” and you will see a very big page: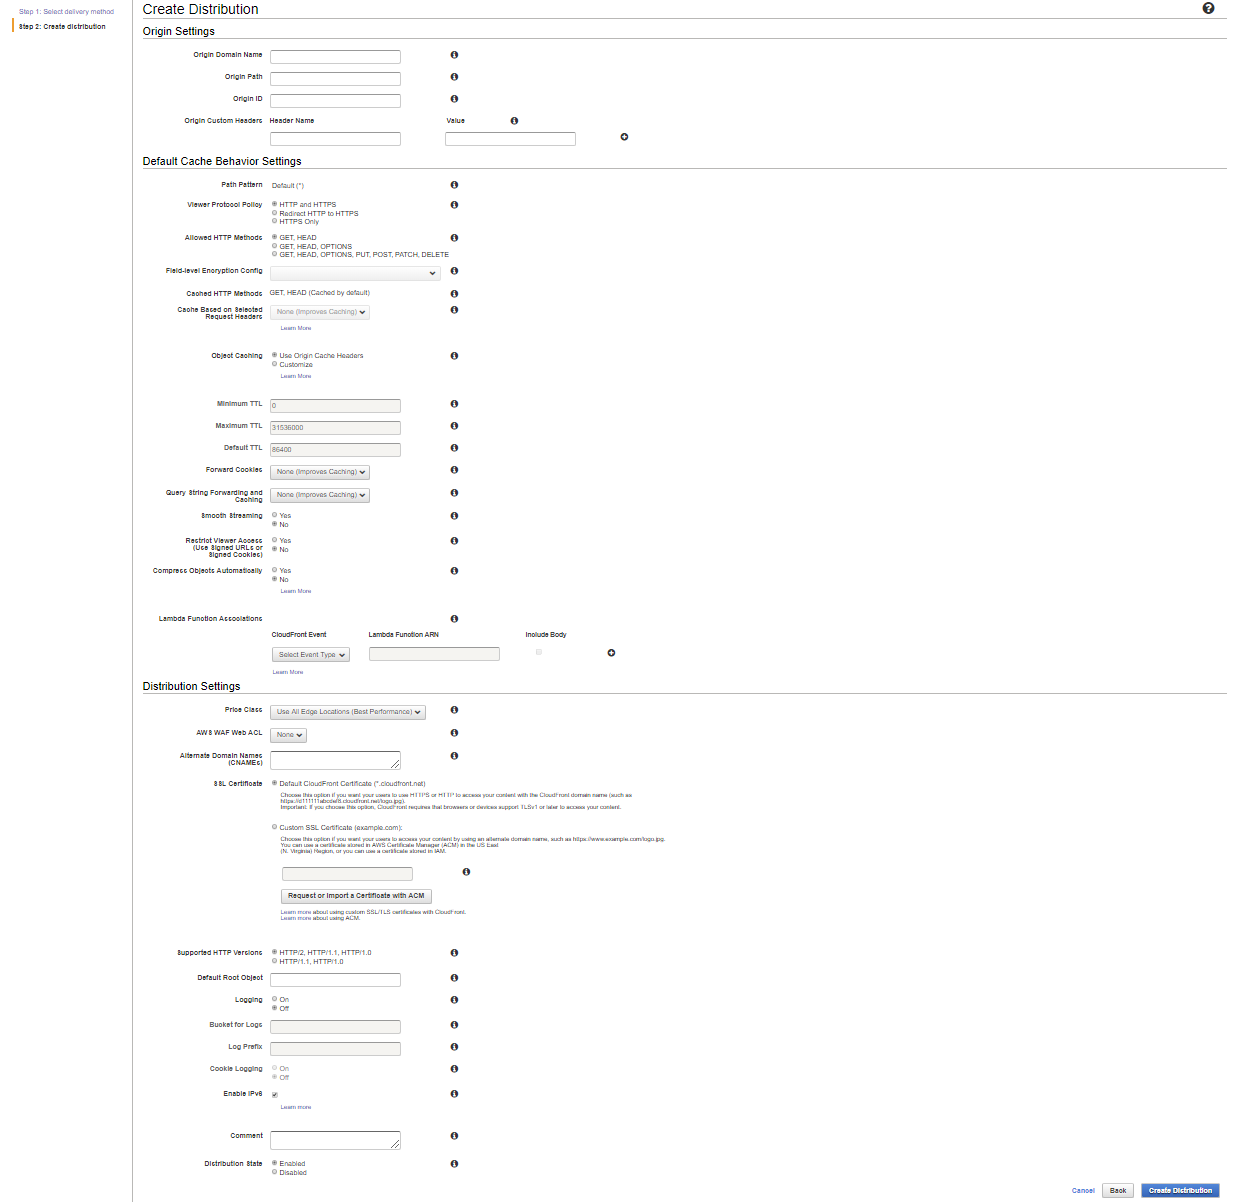
So you will fill this page in as following (change accordingly to your chosen bucket names):
Origin Domain Name: ulyaoth-s3-html-tutorial.s3.amazonaws.com (Choose your own S3 bucket from the drop-down)
Origin ID: S3-ulyaoth-s3-html-tutorial (Choose your own comment here)
Restrict Bucket Access: Yes
Origin Access Identity: Create a New Identity
Grant Read Permissions on Bucket: Yes, Update Bucket Policy
Viewer Protocol Policy: Redirect HTTP to HTTPS
Allowed HTTP Methods: GET, HEAD
Object Caching: Use Origin Cache Headers
Forward Cookies: None
Query String Forwarding and Caching: None
Smooth Streaming: None
Restrict Viewer Access (Use Signed URLs or Signed Cookies): No
Price Class: Use All Edge Locations
AWS WAF Web ACL: None
It is not in my best interest to go explain all the options because AWS does this much better than me! so I really recommend you to read through this page:
https://docs.aws.amazon.com/AmazonCloudFront/latest/DeveloperGuide/GettingStarted.html
By doing this you will get a understand of why we choose the options above and what they actually mean.
Now I stopped here with filling in all the options because the next options require some attention let start with the next option:
Alternate Domain Name (CNAMEs): s3-html-tutorial.ulyaoth.com
This option will be the domain name you will use to browse your website, so please be 100% sure to choose your own domain name.
Now we need to create an SSL certificate so the next option chooses this:
SSL Certificate: Custom SSL Certificate (example.com)
And then press on the grey button called “Request or Import a Certificate with ACM” and you will see a new page open: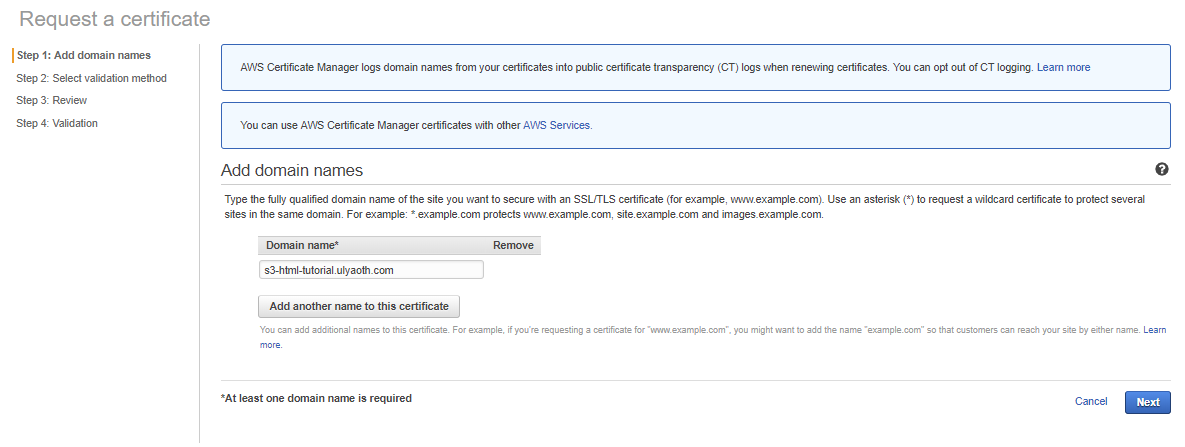
And as you see I already filled in the domain name I will be using “s3-html-tutorial.ulyaoth.com” so please fill in your domain name and press the blue “Next” button.
You will now see a page as follows: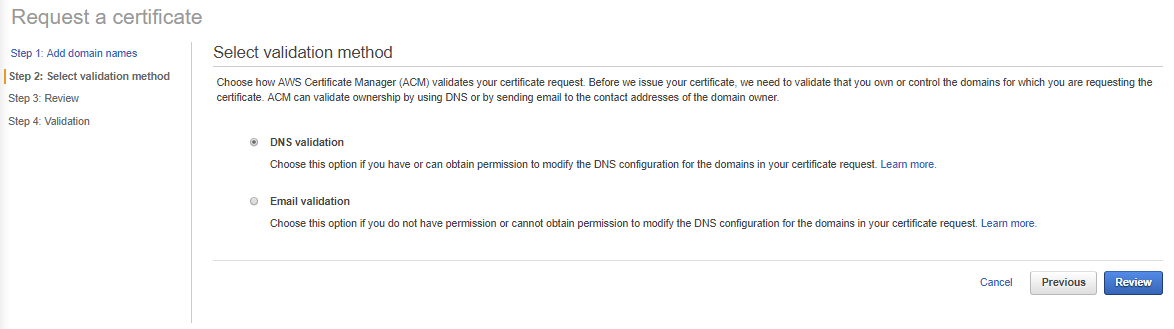
In my case and for this tutorial I will verify myself by Email, this is required to allow AWS to create a certificate for me.
So I choose “Email Verification” and then I press the blue button called “Review” you should then see something similar as: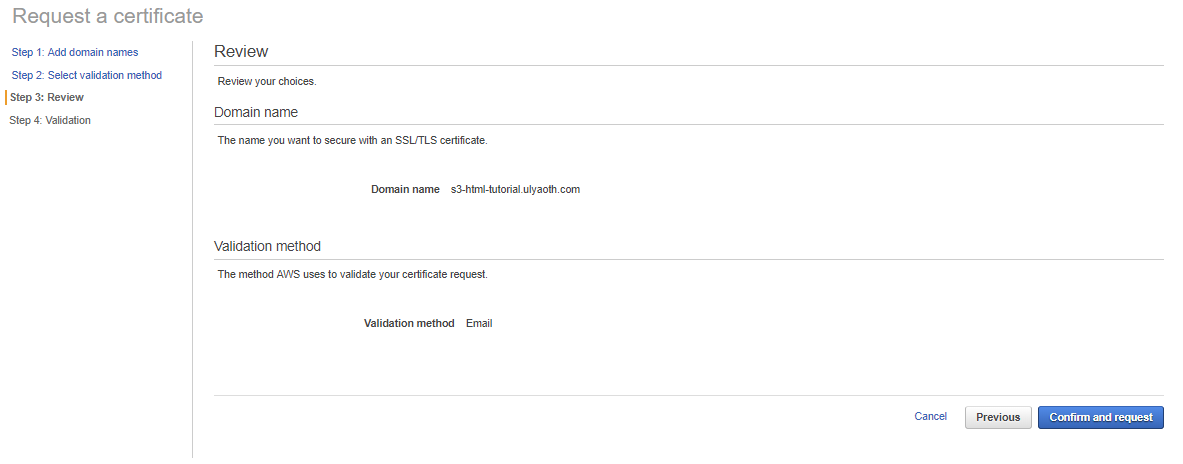
On this page if everything looks fine then just press on the blue button called “Confirm and request” and you will see: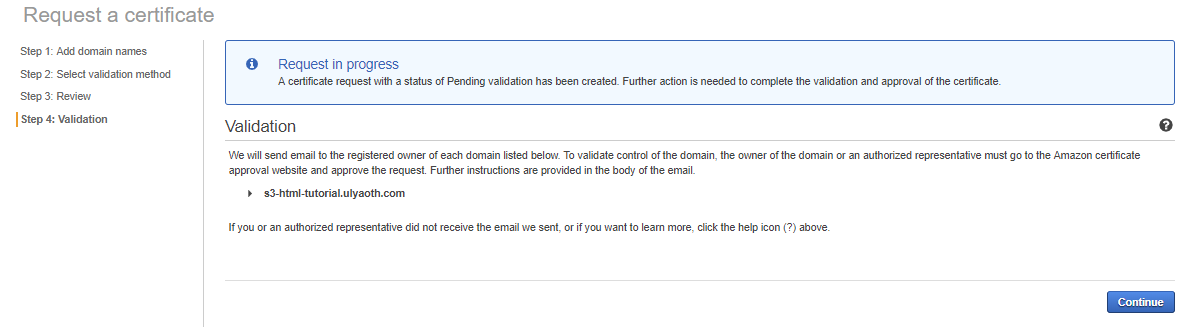
You can press on continue here and now within a few minutes you should get an email from AWS as follow:
Double check if everything looks correct and press on the link “Amazon Certificate Approvals” and then you should see this web page: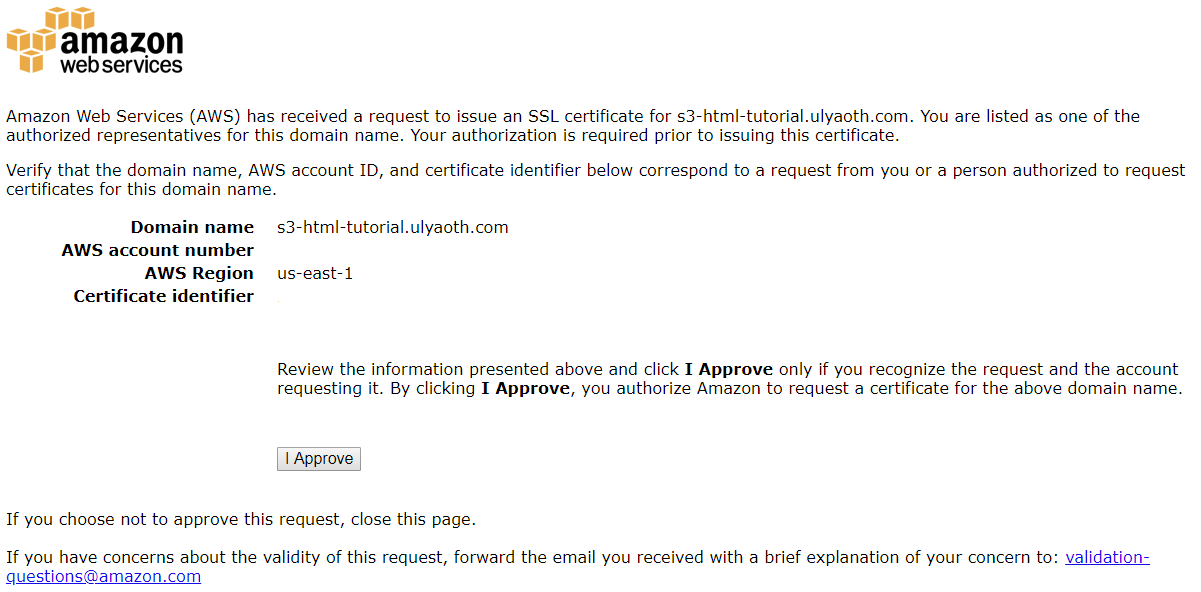
The web page is basically a repeat of the email so if you already verified all looks fine press on the gray “I Approve” button and you see a success message: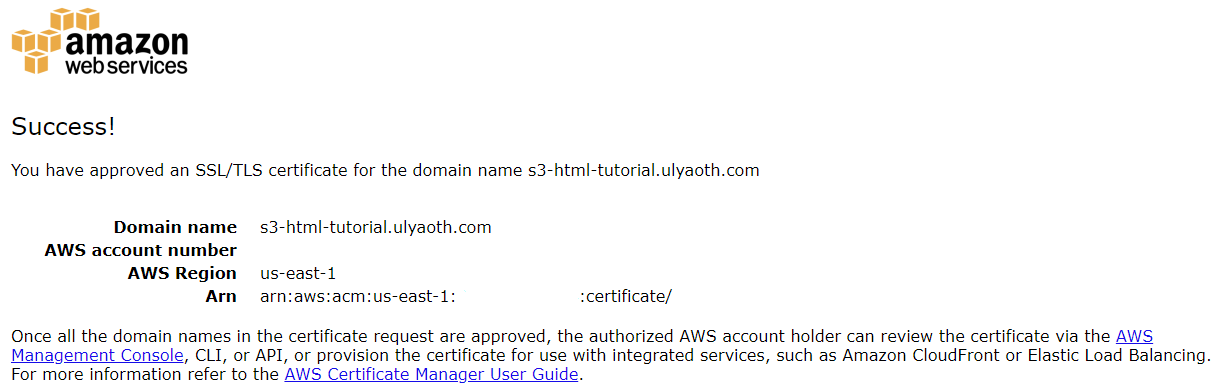
If you go back to the page of the certificates you should now see a green “Issues” at the status: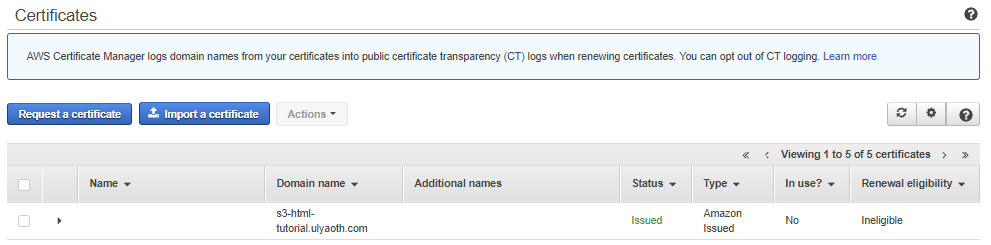
You can close this page and go back to the tab in your browser where we are filling in the CloudFront.
Now under the “Custom SSL Certificate (example.com):” is a white box, if you click in it you get a dropdown and you can choose the certificate that matches your domain: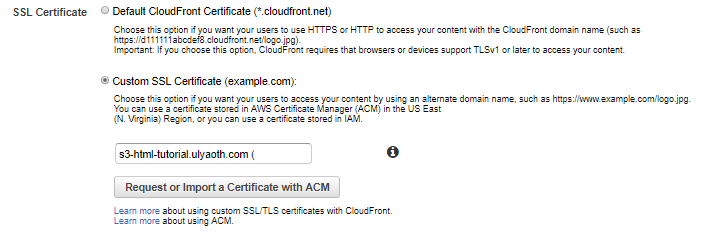
(some people have told me they not see the certificate, it seem you must reload the page in this case and fill in everything again :/ )
now fill in the rest of the options as follows:
Security Policy: TLSv1.2_2018
Supported HTTP Versions: HTTP/2, HTTP/1.1, HTTP/1.0
Default Root Object: index.html
Logging: Off
Enable IPv6: (leave it as it is)
Distribution State: Enabled
If you did, all the same, it should now look like this: (click the image to enlarge)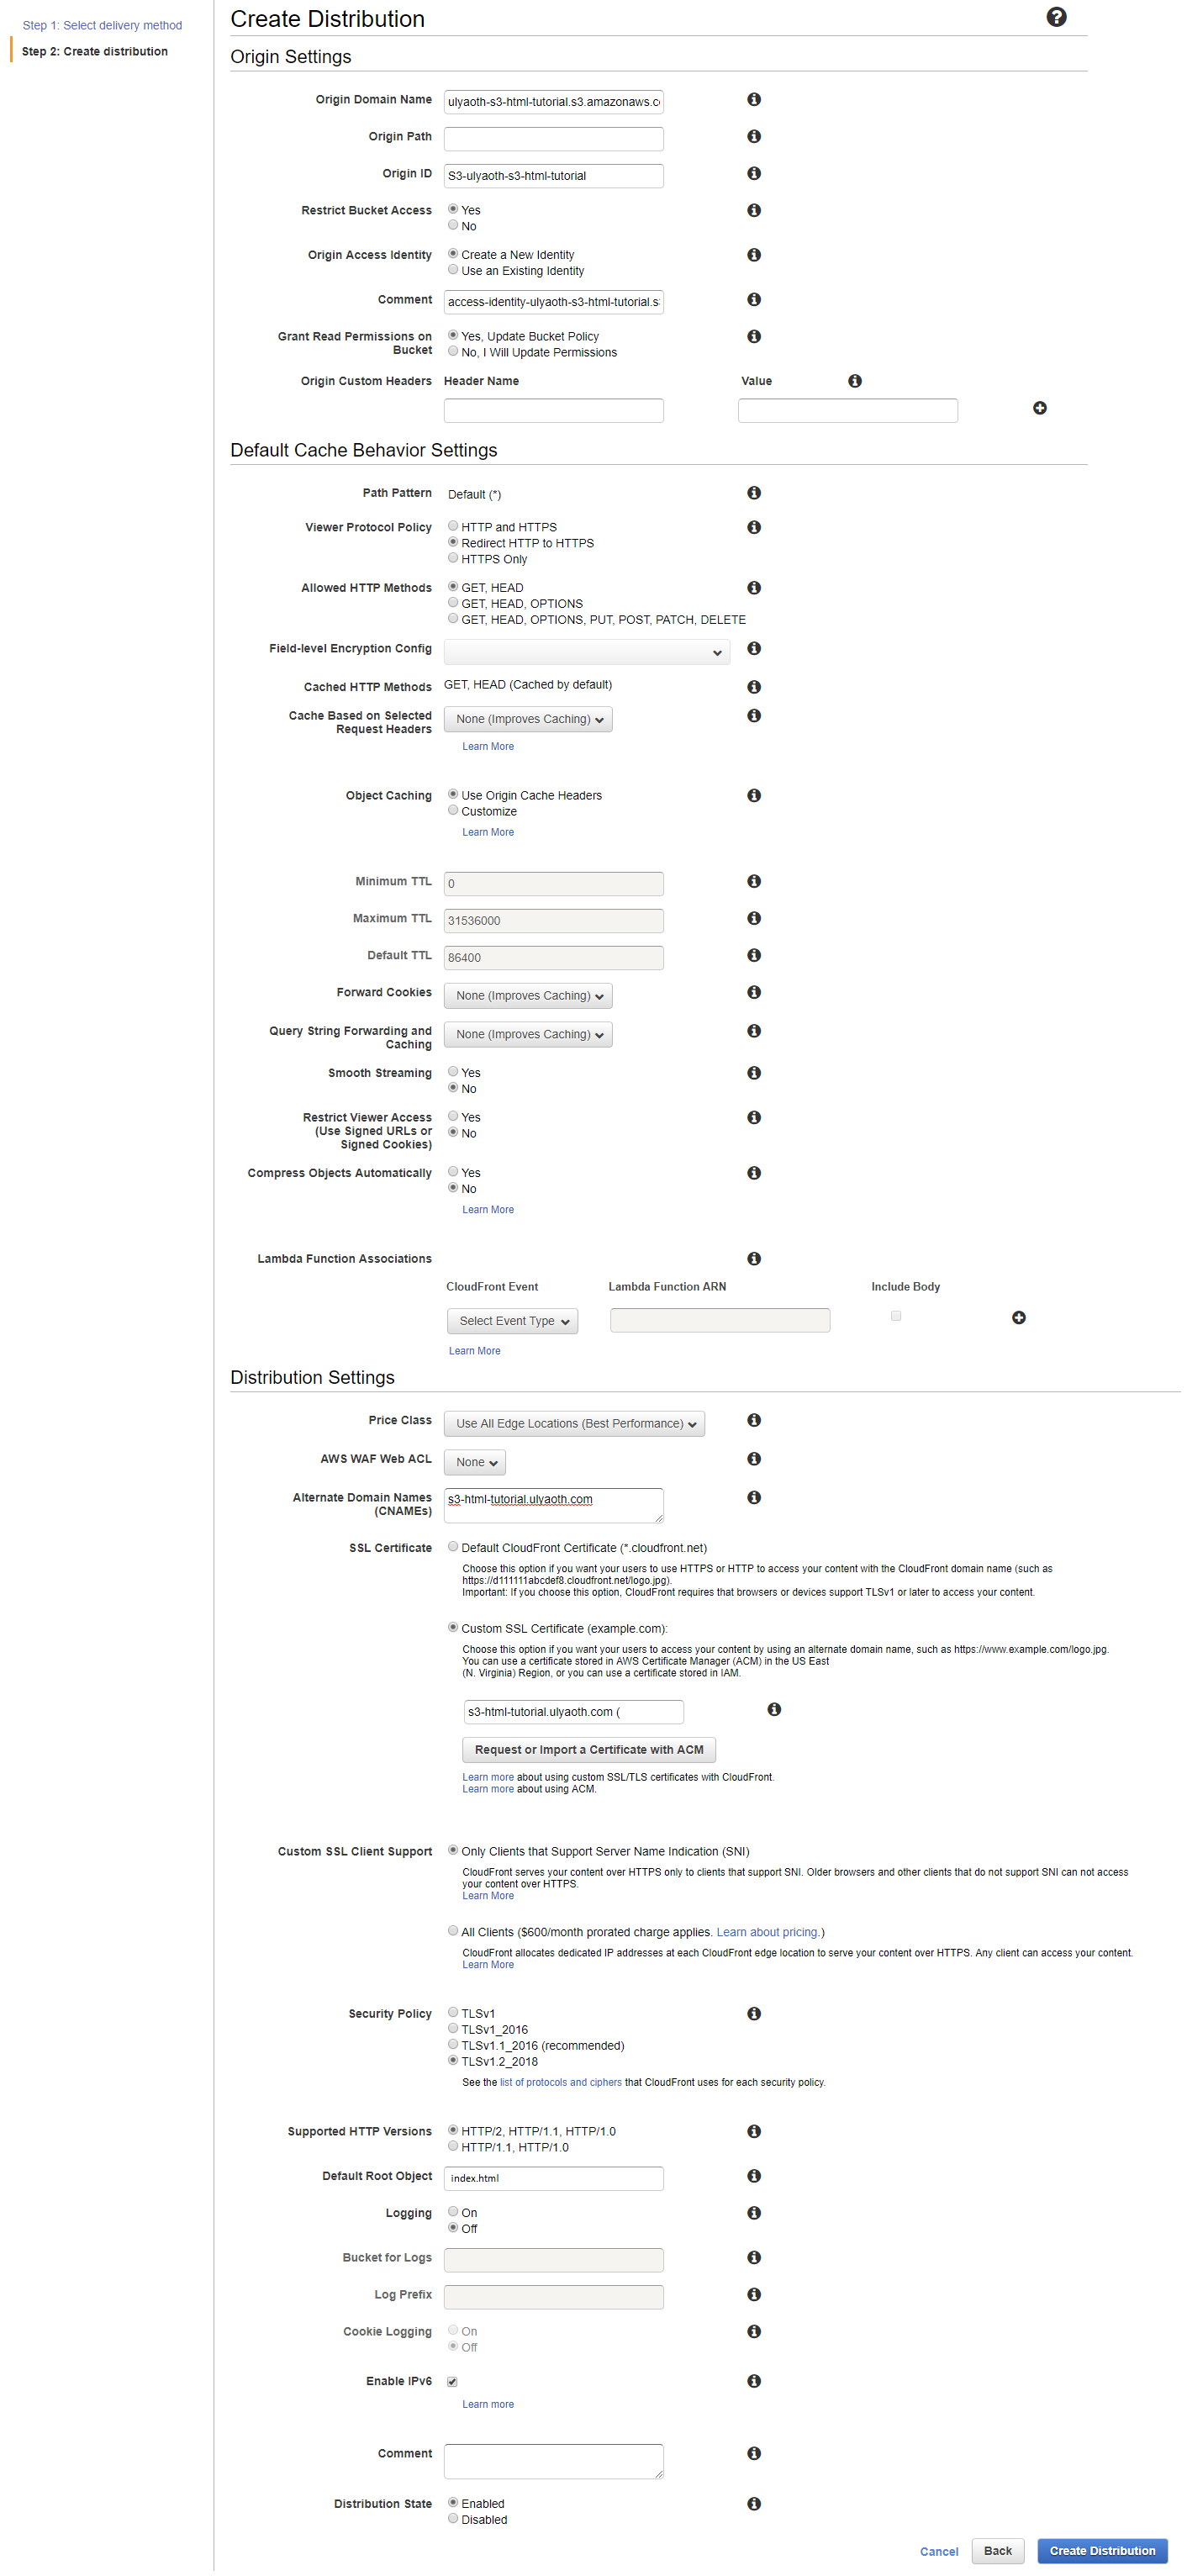
If it does then press on the “Create Distribution” button and then you have to wait for about 15 minutes to let CloudFront do its thing and create itself for you.
On the “Distributions” page you should now see: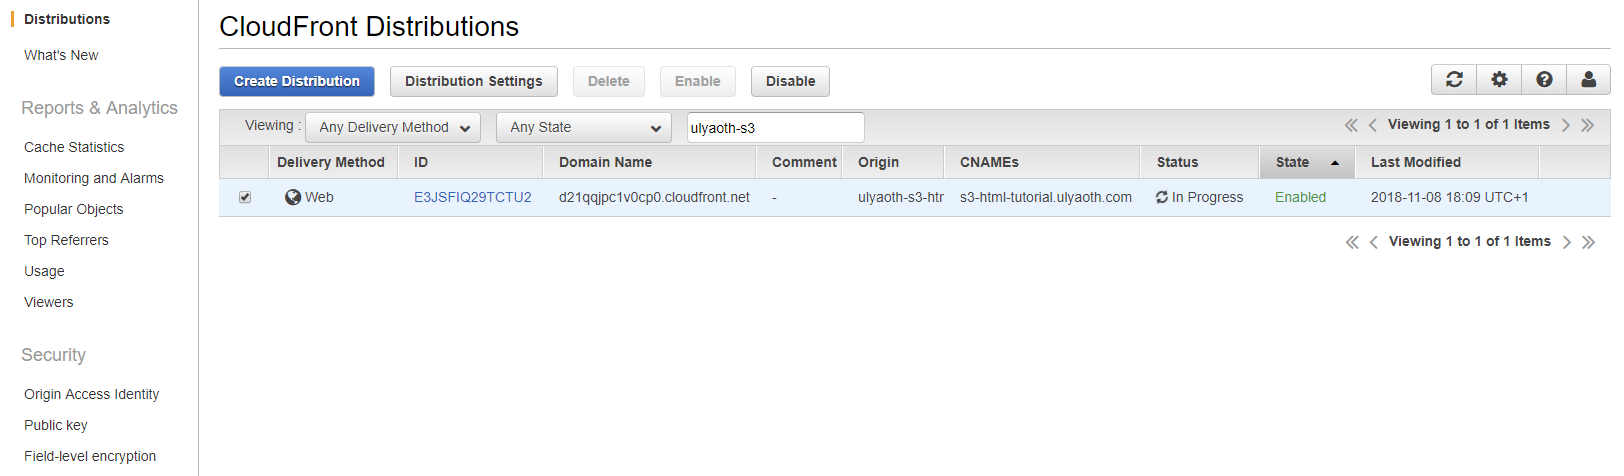
Status: In Progress
This means CloudFront is still creating your distribution and as I wrote it could take up to 15 minutes for this to complete, once it is finished you will see: Status: Deployed
However, something else important is that you also see now “Domain Name” and “CNAMEs” for me this shows:
Domain Name: d21qqjpc1v0cp0.cloudfront.net
CNAMEs: s3-html-tutorial.ulyaoth.com
So what this means is you must now go to your DNS provider and create a CNAME as following:s3-html-tutorial.ulyaoth.com CNAME d21qqjpc1v0cp0.cloudfront.net
So after a while and your distribution status has changed to “Deployed” you can finally browse your website!
So for me, I go to “https://s3-html-tutorial.ulyaoth.com” and I now see my HTML website: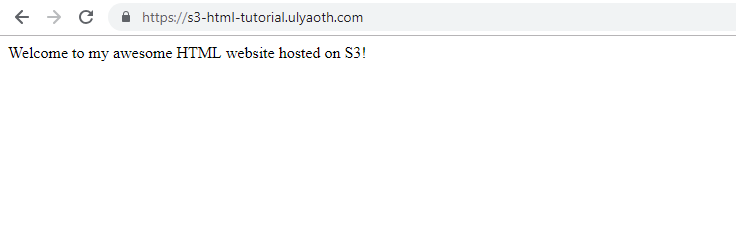
Congratulations that was all! 🙂 Of course, there is much more you can do now and better ways to upload your site to S3, but that is all a “next” step! I think this showed in small how easy it was to host a basic HTML site on S3 without using any servers.