***
Please be aware the Ulyaoth Repository has been discontinued! Please read:
https://ulyaoth.com/news/ulyaoth-repository-end-of-life/
You can still make this tutorial work but you will need to compile the packages yourself, please be aware our GitHub is not longer updated however: https://github.com/ulyaoth/repository
***
Ulyaoth repository no longer supports HHVM
In this guide I will show how you can install WordPress (https://wordpress.org/) on Fedora using Nginx and HHVM (old HipHop php).
For this guide I used the following:
blog01 (1x cpu, 512mb ram)
Fedora
WordPress
SSL Certificate
This guide should also work on RHEL and CentOS but you might need to change some directory locations or use slightly different commands.
Step 1: Add the Ulyaoth repository
For Fedora use:
$ dnf install https://downloads.ulyaoth.net/rpm/ulyaoth-latest.fedora.x86_64.rpm
For RHEL or CentOS see my repository for more information:
https://community.ulyaoth.com/resources/ulyaoth.2/
As I wrote in the top of this post that Ulyaoth repository does no longer support HHVM (ulyaoth-hhvm), you will have to compile or download this somewhere else: https://hhvm.com/
Step 2: install the required packages
$ sudo dnf install ulyaoth-nginx ulyaoth-hvvm mariadb mariadb-server policycoreutils-python
Step 3: Create the following directories
$ sudo mkdir -p /etc/nginx/access-lists

$ sudo mkdir -p /etc/nginx/ssl

$ sudo mkdir -p /srv/nginx/wordpress/public

$ sudo mkdir -p /var/log/nginx/wordpress
Step 4: Download WordPress
$ sudo wget https://wordpress.org/latest.tar.gz
Step 5: Untar your WordPress tar.gz file.
$ tar xvf latest.tar.gz
You should now have a folder “wordpress”.
Step 6: Move all wordpress files to the right directory
$ sudo mv wordpress/* /srv/nginx/wordpress/public/
Step 7: Download the vhost and access-list file for nginx
$ sudo wget -q https://raw.githubusercontent.com/sbagmeijer/ulyaoth/master/guides/wordpress/nginx/wordpress.conf -O /etc/nginx/sites-available/wordpress.conf

$ sudo wget -q https://raw.githubusercontent.com/sbagmeijer/ulyaoth/master/guides/wordpress/nginx/wordpress-accesslist.conf -O /etc/nginx/access-lists/wordpress-accesslist.conf
Step 8: Install your certificates
Get the certificates from where you bought them or yourself generated one and place them in:
/etc/nginx/ssl
To create your dhparams file please use the following command:
sudo $ openssl dhparam -out /etc/nginx/ssl/dhparam.pem 4096
Remember if your certificate files are not called “ulyaoth-blog.crt”, “ulyaoth-blog.key” and “ulyaoth-blog.ca” then you have to rename them in your wordpress.conf vhost file so it will use the right certificates.
Step 9: Edit the WordPress vhost and the access list.
$ sudo vi /etc/nginx/sites-available/wordpress.conf
Now change all the domain names from “ulyaoth.net” to your domain name, please make sure to double check your whole file.
Then double check all the certficiate names and name them how your certificates are names (check the whole file):
ssl_certificate /etc/nginx/ssl/ulyaoth-phpbb.pem;

ssl_certificate_key /etc/ssl/certs/ulyaoth-phpbb.key;

ssl_trusted_certificate /etc/ssl/certs/ulyaoth-phpbb.ca;
Now as final you have to create a “sha256 pin” with the following command: (update so it uses your key)
$sudo openssl rsa -in /etc/nginx/ssl/ulyaoth-phpbb.key -outform der -pubout | openssl dgst -sha256 -binary | openssl enc -base64
It should give an output like this:
writing RSA key

zcoKJuisd789hasddasasd32k4VUxsof3d3w22332b7k=
Then in the vhost update this bit with your key:
add_header Public-Key-Pins "pin-sha256=\"zcoKJuisd789hasddasasd32k4VUxsof3d3w22332b7k=\"; max-age=172800;";
Now save that file and open the wordpress-accesslist file:
$ sudo vi /etc/nginx/access-lists/wordpress-accesslist.conf
and add now all ip’s you want to have access to the “wp-admin” control panel of WordPress:
#allow your ip below something like "allow 1.1.1.1;"

allow ;
As it already explains just add your ip’s like this for example:
#allow your ip below something like "allow 1.1.1.1;"

allow 192.168.1.3;

allow 192.168.1.4;
Just make sure that the “deny all;” is always at the bottom of the file.
Now save the access list and continue the guide.
Step 10: symbolic link your vhost
$ sudo ln -s /etc/nginx/sites-available/wordpress.conf /etc/nginx/sites-enabled/wordpress.conf
Step 11: Copy the example config for a small MariaDB database to real config location.
$ sudo cp /usr/share/mariadb/my-small.cnf /etc/my.cnf
Of-course if you expect a large database you have to or make your own MariaDB config or in the location “/usr/share/mysql/” you have more examples:
my-huge.cnf

my-large.cnf

my-medium.cnf

my-small.cnf

my-innodb-heavy-4G.cnf
Step 12: Start the MariaDB database
$ sudo systemctl start mariadb.service
Step 13: run the MariaDB secure installation script
$ sudo /usr/bin/mysql_secure_installation
I would recommend to do the steps I did below:
Enter current password for root (enter for none): (ENTER)

Set root password? [Y/n] Y

New password:

Re-enter new password:

Password updated successfully!

Remove anonymous users? [Y/n] y

Disallow root login remotely? [Y/n] y

Remove test database and access to it? [Y/n] y

Reload privilege tables now? [Y/n] y
Step 14: Login to the MariaDB database
$ sudo mysql -uroot -p
(you have to use the password from Step 13 that you created)
Step 15: In the MariaDB client create the following user and database
CREATE DATABASE wordpress;

GRANT ALL PRIVILEGES ON wordpress.* TO "wordpress"@"localhost" IDENTIFIED BY "ulyaoth007";

GRANT ALL PRIVILEGES ON wordpress.* TO "wordpress"@"127.0.0.1" IDENTIFIED BY "ulyaoth007";

FLUSH PRIVILEGES;
(Make sure to change to example password “ulyaoth007” to something random)
Step 16: exit the MariaDB client
exit
Step 17: Put everything on autostart
$ sudo systemctl enable mariadb.service

$ sudo systemctl enable hhvm.service

$ sudo systemctl enable nginx.service
Step 18: Chown the web directory to wordpress:nginx
$ sudo chown -R hhvm:nginx /srv/nginx/wordpress/
Step 19: Fix directory permissions
$ sudo find /srv/nginx/wordpress/public/ -type d -exec chmod 755 {} \;

$ sudo find /srv/nginx/wordpress/public/ -type f -exec chmod 644 {} \;

$ sudo chmod 0775 /srv/nginx/wordpress/public/wp-content/

$ sudo chmod 0775 /srv/nginx/wordpress/public/wp-content/themes/
Step 20: fix Selinux
$ sudo setsebool -P httpd_can_network_connect on

$ sudo chcon -R -t httpd_sys_content_t /srv/nginx/wordpress/public/

$ sudo chcon -R -t httpd_sys_rw_content_t /srv/nginx/wordpress/public/wp-content

$ sudo chcon -R -t httpd_sys_rw_content_t /srv/nginx/wordpress/public/wp-includes

$ sudo chcon -R -t httpd_sys_rw_content_t /srv/nginx/wordpress/public/wp-admin

$ sudo semanage port -a -t http_port_t -p tcp 80

$ sudo restorecon /etc/nginx/ssl/*
Step 21: configure firewalld
$ sudo firewall-cmd --permanent --zone=public --add-service=http

$ sudo firewall-cmd --permanent --zone=public --add-port=443/tcp

$ sudo firewall-cmd --reload
You can check with this command to see it is all added:
$ sudo firewall-cmd --zone=public --list-all
You probably have to change “zone=public” to your servers setup.
Step 22: Start nginx and hhvm
$ sudo systemctl start hhvm.service

$ sudo systemctl start nginx.service
Congratulations this should be everything your require to do on the server so now lets start with the installation of WordPress!
Step 23: Start and finish the installation of WordPress
Start by going to your website for me “https://blog.ulyaoth.net” and you should see the following:
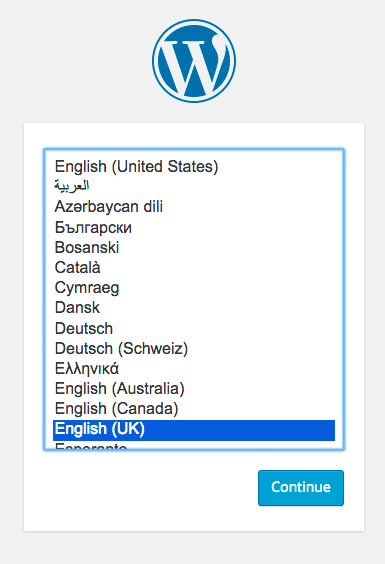
Choose your language and then you should see a website as below:
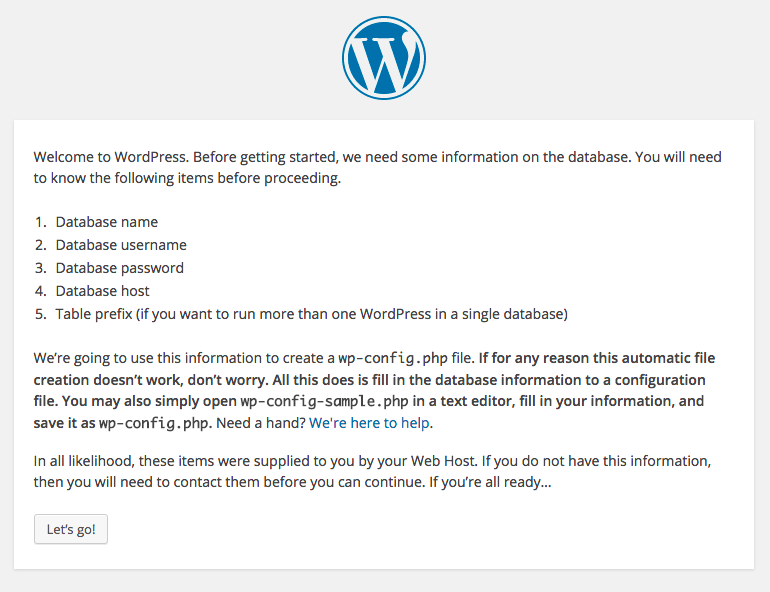
On this page click on the “Let’s go!” button and you should see the following site:
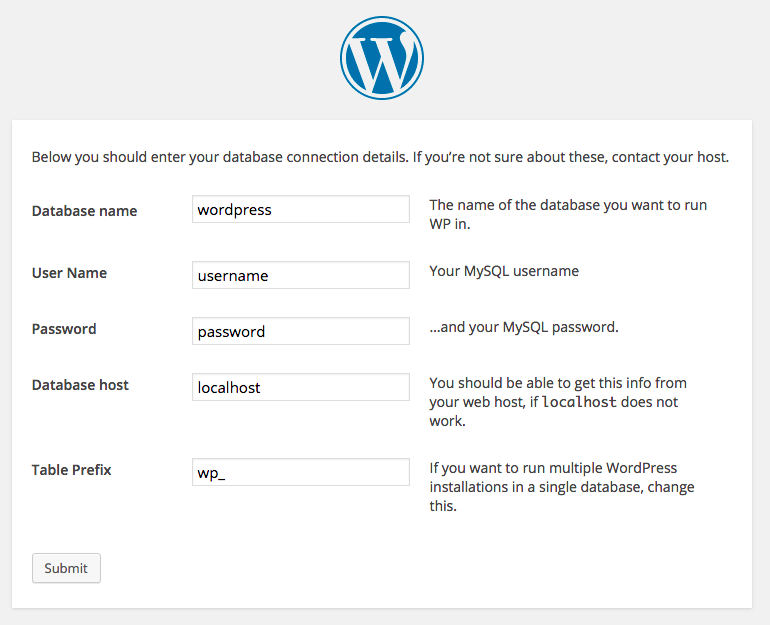
As you can see you have to fill in the database information from step 15:
Database Name: WordPress
User Name: wordpress
Password: xvl04@wCpT
Of-course change it to your information and then press on the button “Submit” and you will see the following page:
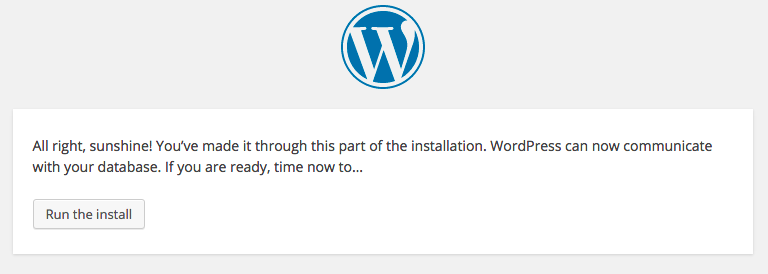
If you followed my guide you probably allowed to write the wp-config.php if you made it slightly more secure then you see a page where it shows you the content you have to copy paste into a “wp-config.php” file yourself:
$ sudo vi /srv/nginx/wordpress/public/wp-config.php
Now paste all the information from the site and safe the file and the run the following commands:
$ sudo chown -R hhvm:nginx /srv/nginx/wordpress/

$ sudo find /srv/nginx/wordpress/public/ -type f -exec chmod 644 {} \;
Make sure your config file is always secure so no one can write to it in anyway.
Now back on the website press the “Run the install” button and if everything did go well you should see this page now:
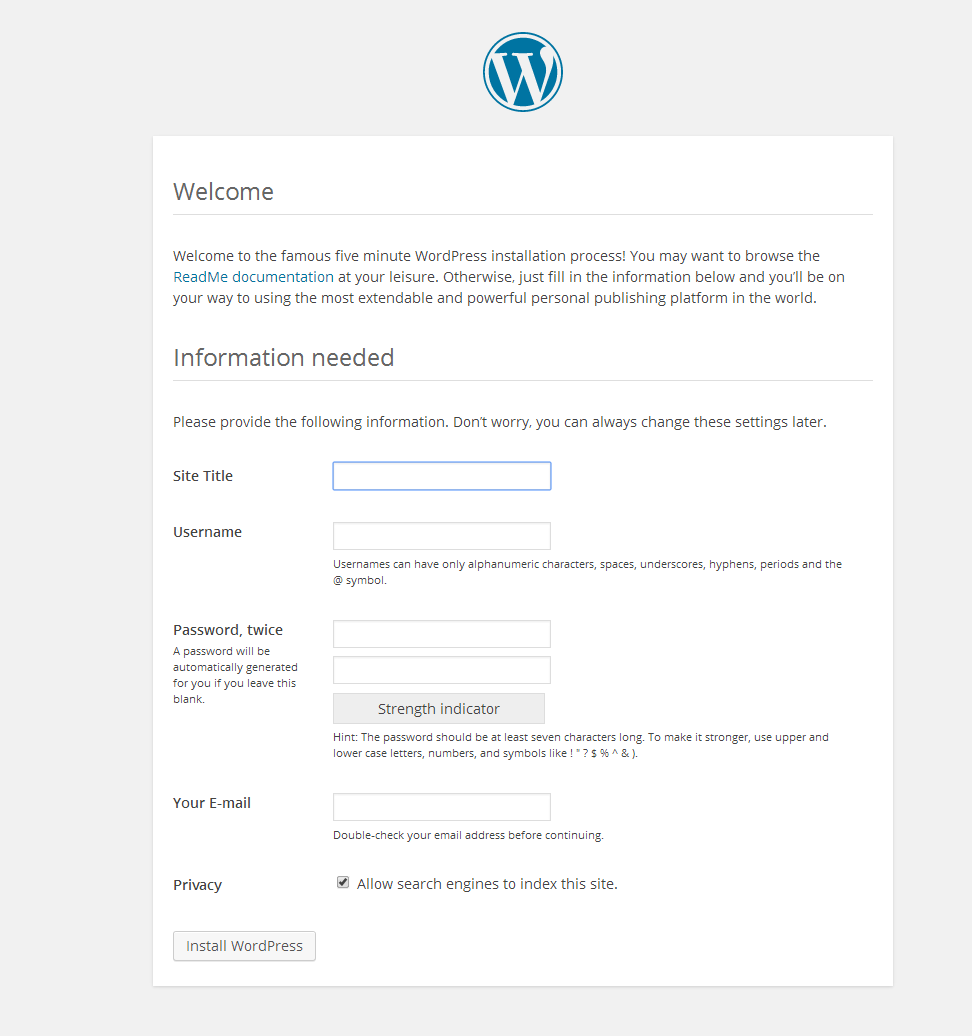
On this page fill in your information as you wish, I would suggest not to use the username “Admin” or “Administrator” as this are the first user names bots and scripts will try to access.
Once filled in press on the “Install WordPress” button to finish the installation and if everything did install correctly you will see the following page:
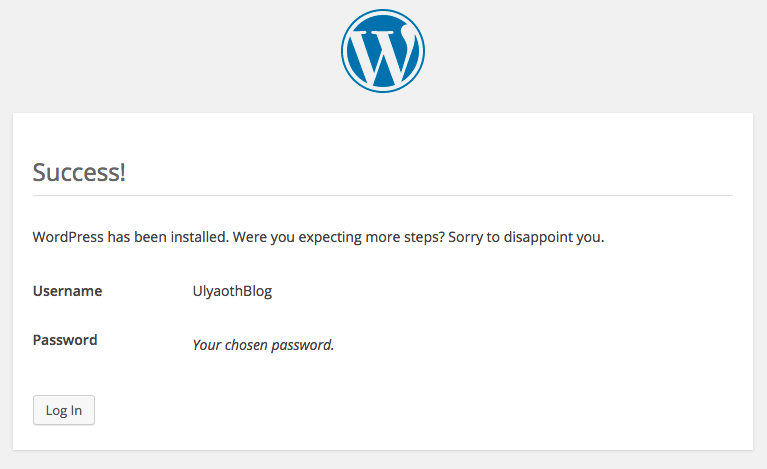
What next? well press the “Log in” button and play around with your website or browse to your website url to see the front page of your newly installed WordPress blog.
It should look like this:

As always if you have any improvements or your see any mistakes please let me know so I can update the guide.

