

This post assumes you have a valid Instana license available for your server which can be bought at https://www.instana.com/.
If you want more details about the license or general Instana information your are most welcome to drop me an LinkedIn invite or message
In my small tutorial below I will focus on adding the website functionality to Xenforo, Xenforo is a paid forum system however you can apply the example to any website as long as the JavaScript loads on all your pages.
Step 1: Create your website within Instana
Once you haved logged into your Instana environment please click on the “Websites” link in the top of the page, and fill in your “website Name” since I use multiple domains I tend to use the domain name for the site but you are free to choose.
It should look like this:

If all looks the same (with your chosen name) please click on “Add Website”.
You should now see a page that looks like this:
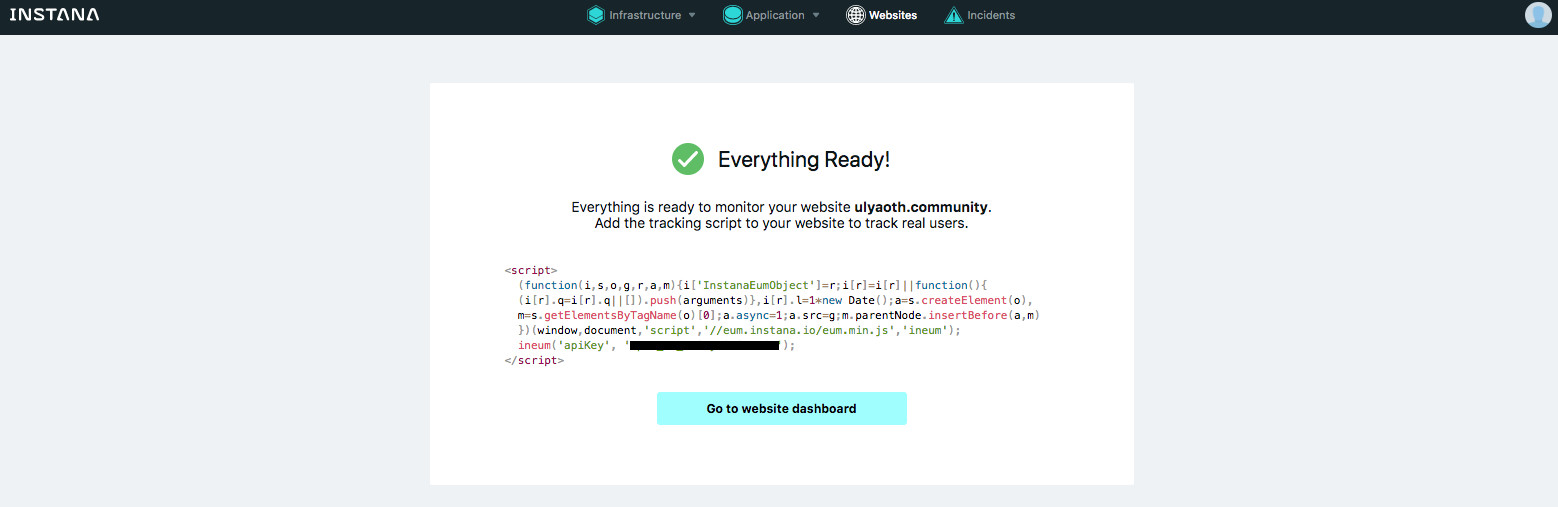
So this is basically the Javascript code that Instana wan’t you to add to your website in our case to Xenforo that will be loaded on every page visit and then provides you details within Instana about your site.
Step 2: Create a Instana template in Xenforo.
Login to your Xenforo admin portal now in the left Menu go to “Appearance” and then under “Styles & templates” click on “Templates”.
You should see something like this:
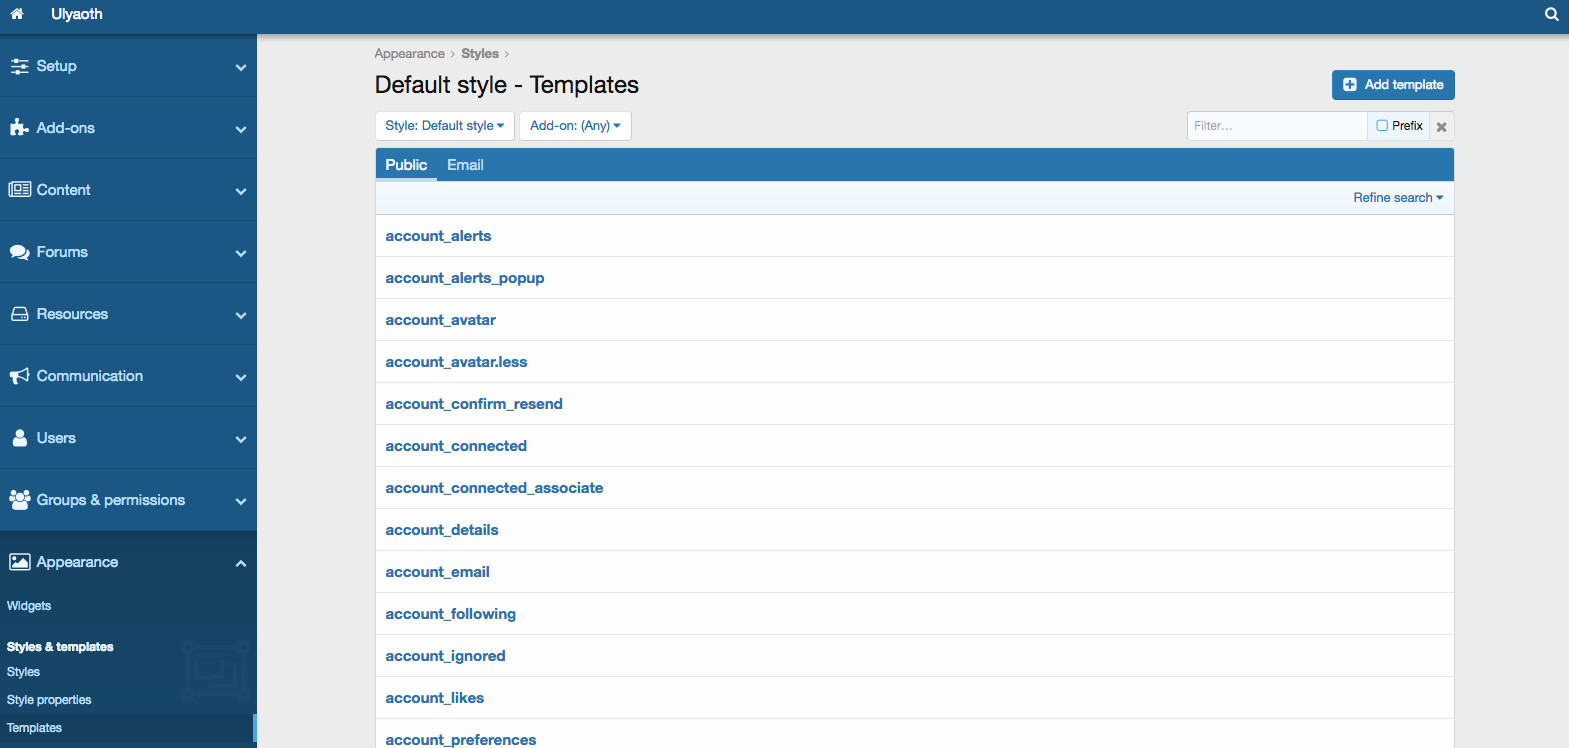
What we have to do is add a new template for the Instana JavaScript so we can add this template to load on each page visit.
So press on the “+ Add template” button in the top of you page you see a page now that allows you to create a new template, you should fill it in as below:
Template name: instana_websites
(function(i,s,o,g,r,a,m){i['InstanaEumObject']=r;i[r]=i[r]||function(){
(i[r].q=i[r].q||[]).push(arguments)},i[r].l=1*new Date();a=s.createElement(o),
m=s.getElementsByTagName(o)[0];a.async=1;a.src=g;m.parentNode.insertBefore(a,m)
})(window,document,'script','//eum.instana.io/eum.min.js','ineum');
ineum('apiKey', 'YOUR API KEY HERE');
Make sure to copy your JavaScript code that has your API key!, if you did all well it should now look like this:
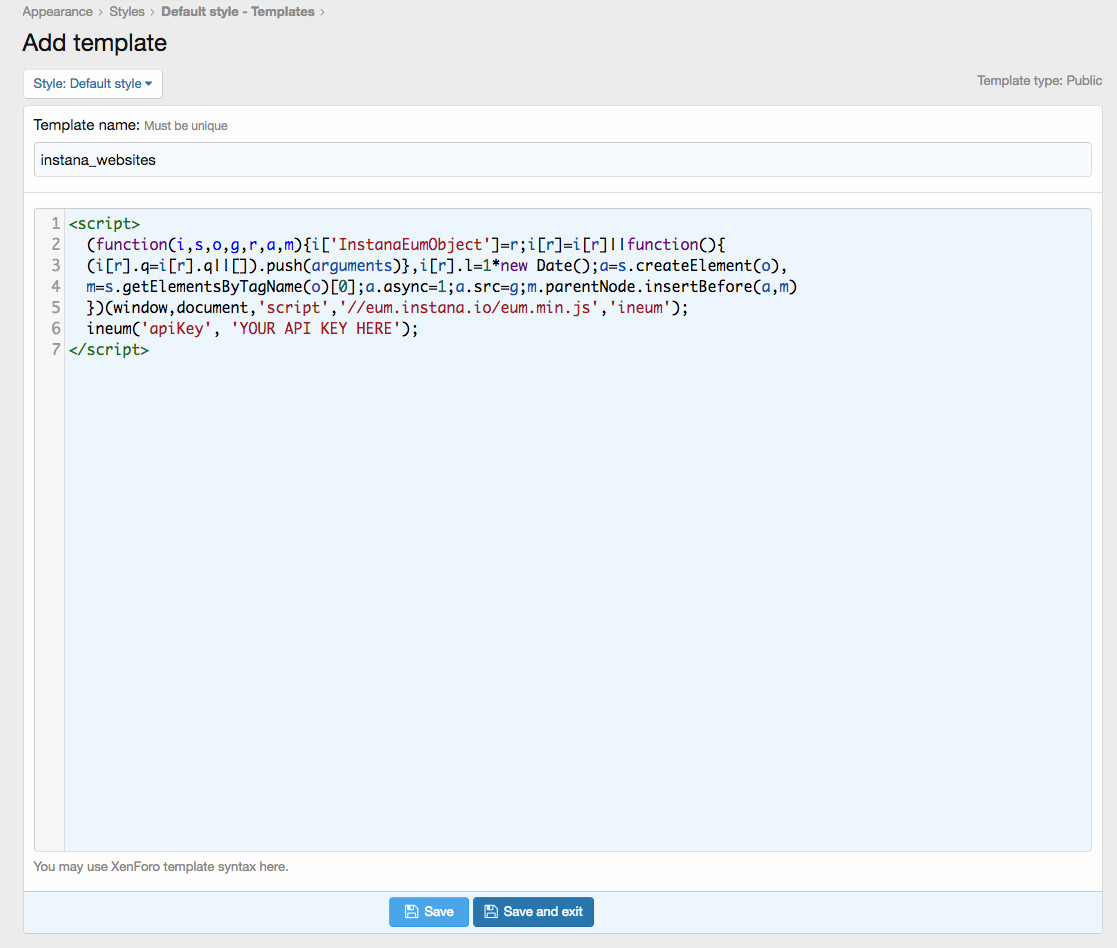
So go ahead and press “Save and exit”.
Step 3: Add Instana template to Xenforo page_container.
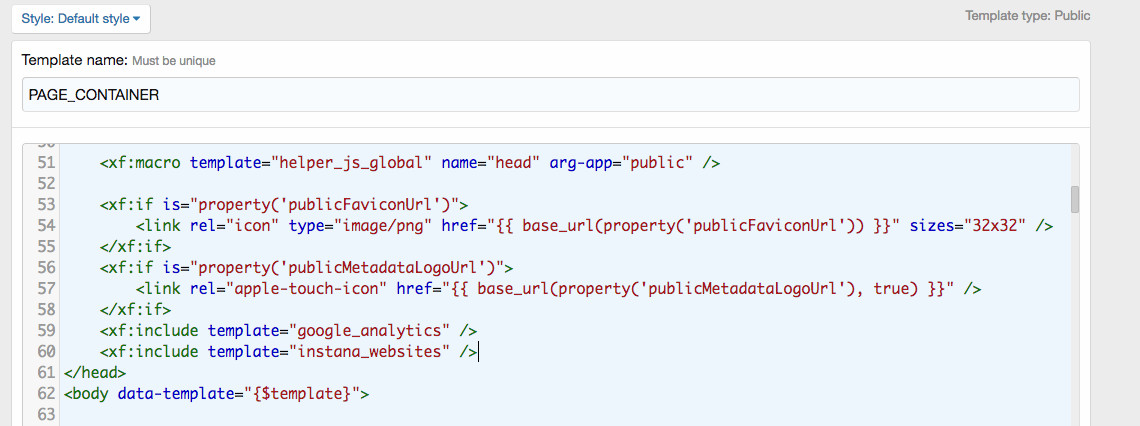
So on the same template page as above “Appearance -> Styles & templates -> Templates” now search for the word: “PAGE_CONTAINER”:
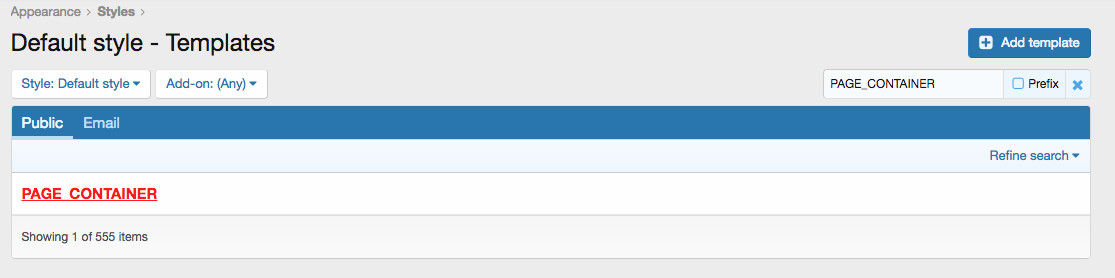
If you found it like the image above then click on the word so it opens the template.
Now in this template you see directly that it is HTML code mixed with “xf” style language however you see “” so the header section of the html, now what I want you to do is scroll slowly down till you find “” for me this is line 60, however this could be a different line number for you.
You will see this code:
You should change this to the following:
The result would be as following:
If everything looks the same like the image above then press on “Save and exit”.
Congratulations you now added successfully the Instana website monitoring to your Xenforo installation.
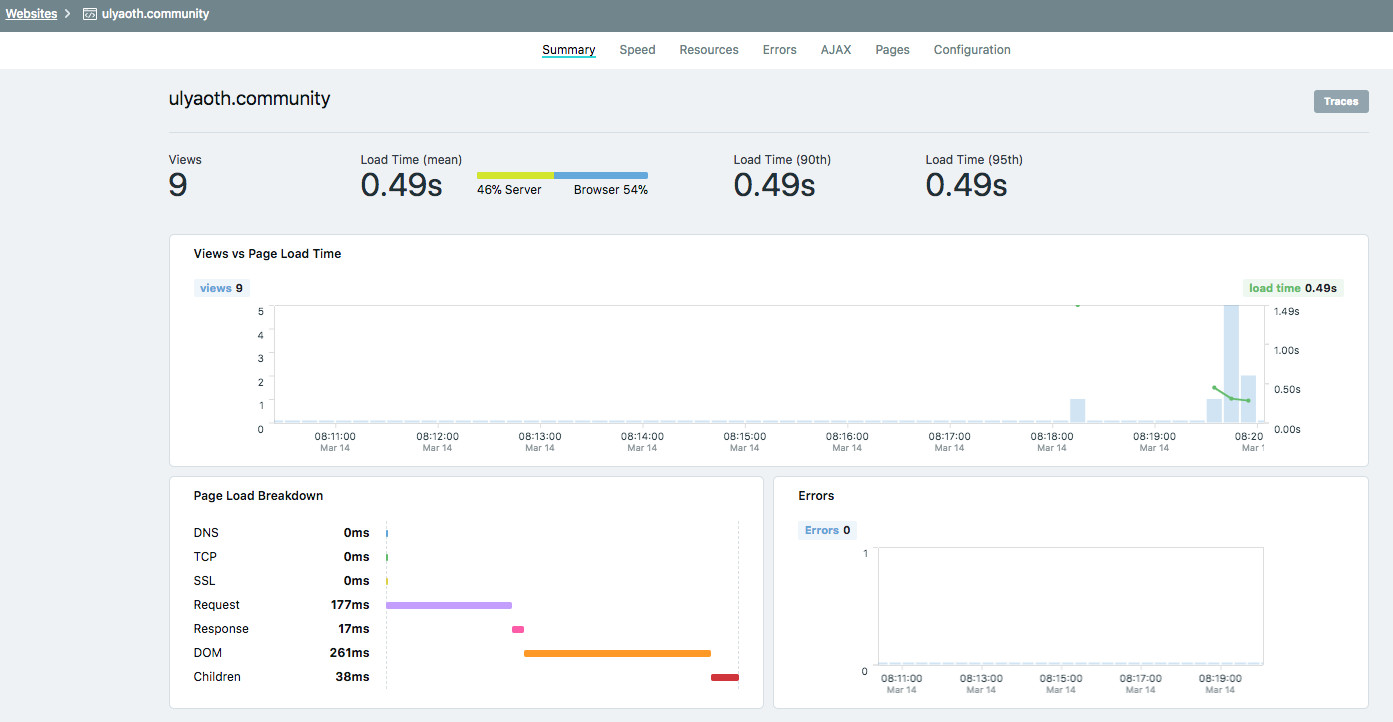
After your website had some traffic (you can refresh yourself few times and click random links) go back to the Instana website, you probably still have the page open that says “Everything Ready!” and your JavaScript code so go ahead and click on “Go to website dashboard”. (if not just click on Websites again in the top of the Instana website)
You will now see your website being monitored:
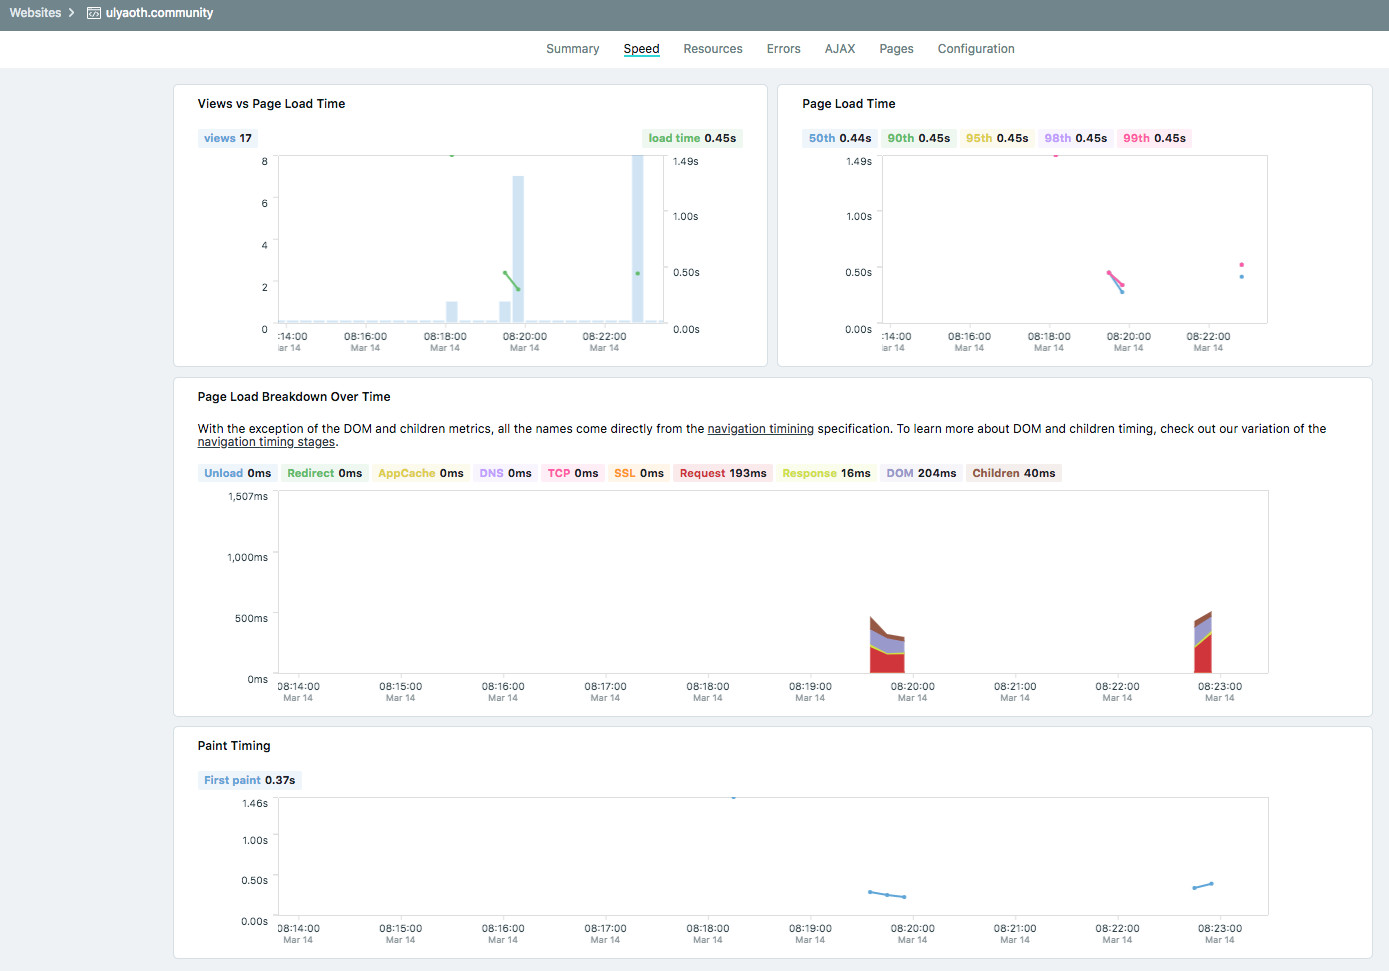
You will have the option check out the speed of your website, unfortunately my forum is not browsed as much as I hoped but to give an example of how it looks like:
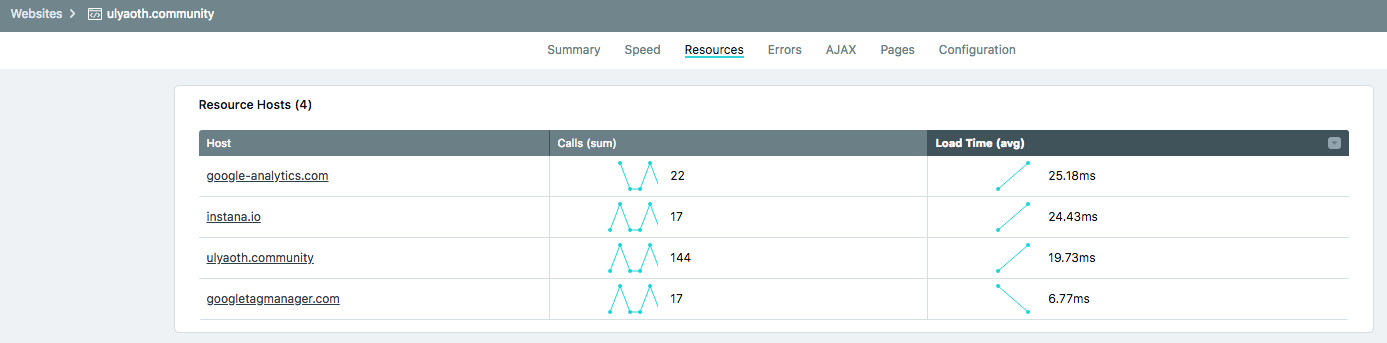
You can see what resources your website is loading:
They have further more options to see Errors and AJAX calls. Now I left the most cool bit about Instana to the end and that is that you can actually now also trace your website calls if you go back to the summary section and click on “Traces” in the top of the page you will see the following:
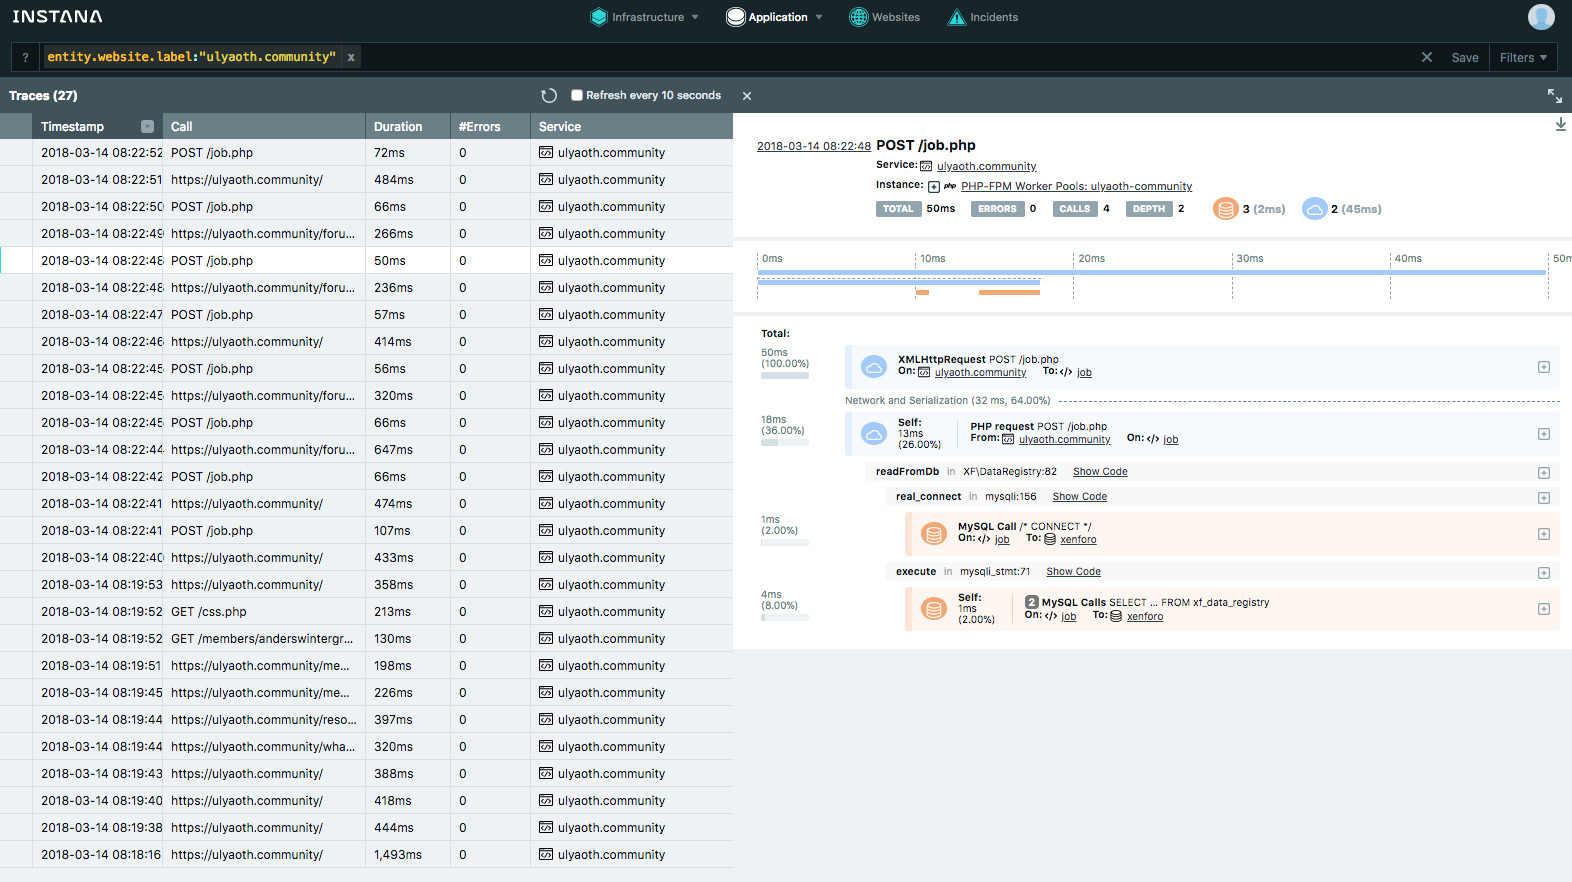
Now this is of-course extremely cool not only can you go in-depth into every call that has been made on your website you can even drill down to the exact SQL queries, or browse the code this is very helpful if you want to troubleshoot.
And that is not all! Your website will even show up now on your application map and you can see live traffic flow of your customers trough your backend environment:
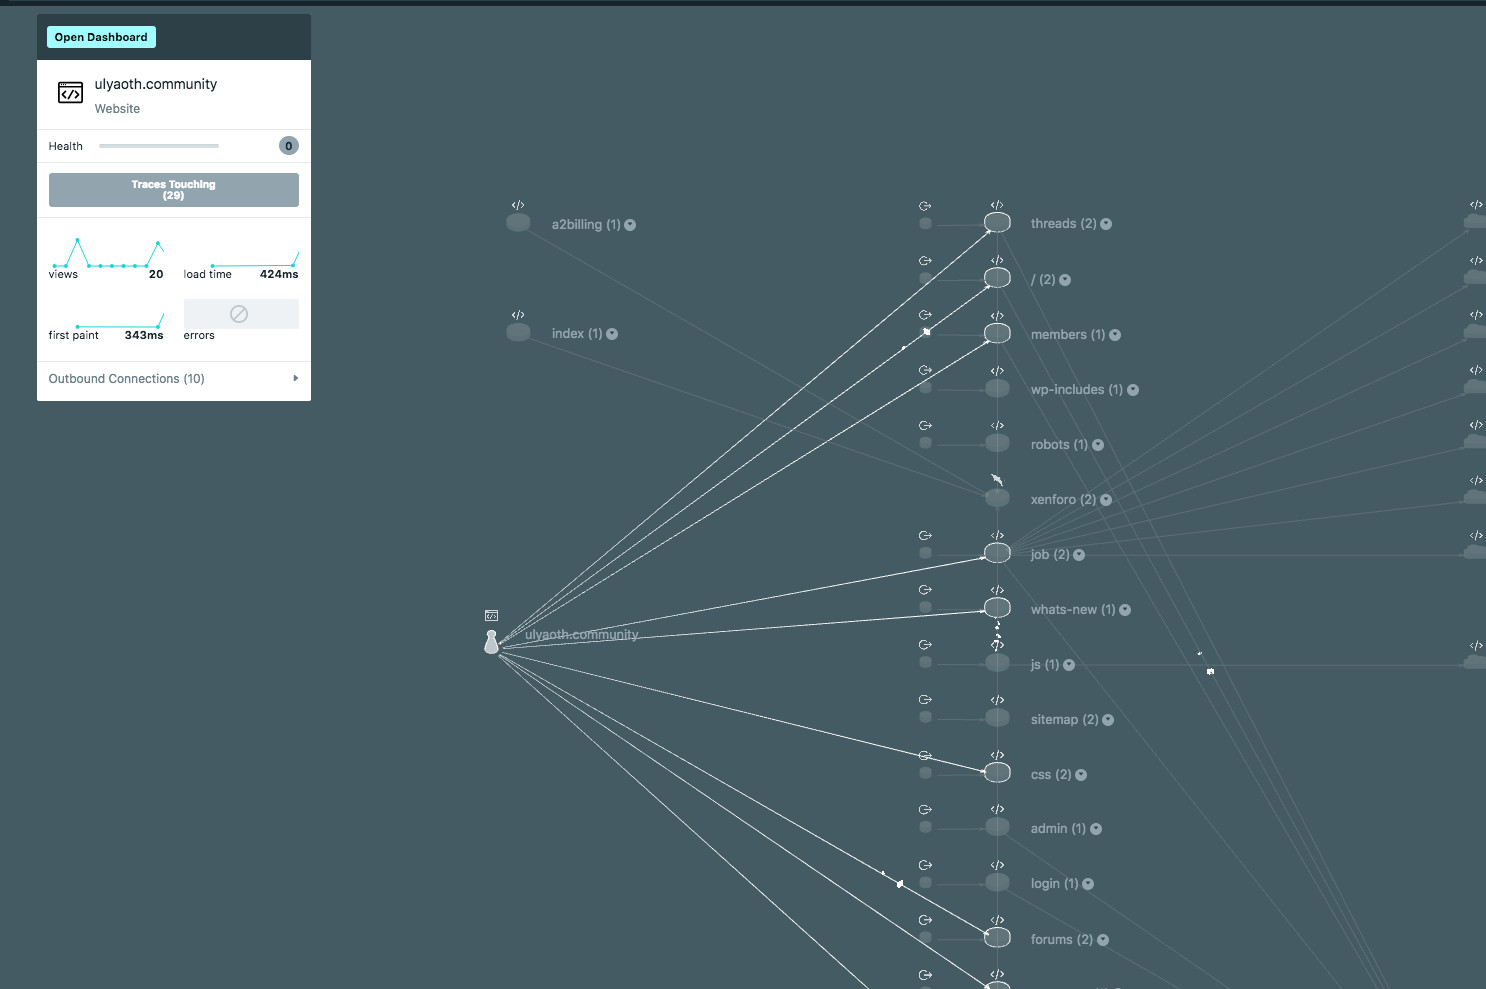
As you can see the white dots on the lines are actually users browsing my forum, and you can exactly trace what they are doing on your website.
Now the image does not show this perfect you have to see this in action! So feel free to contact me or Instana directly if you want to see a small demo of this in real-time. I will see if I can make a video about this also.
You can also read more about the Instana website monitoring (End-User Monitoring) on their website: